
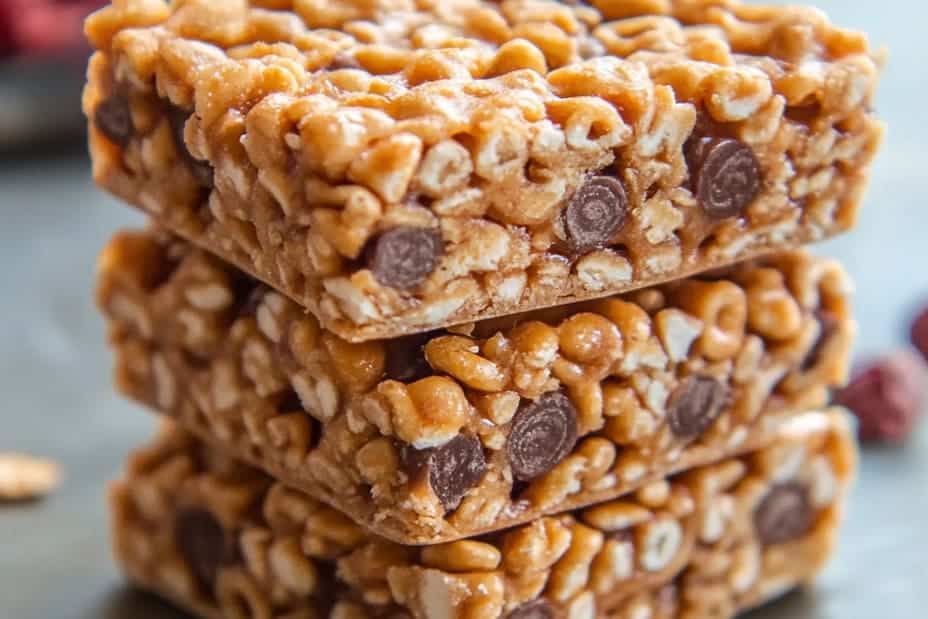
Cereal Bars: A Crunchy and Chewy Snack Perfect for Easter Brunch is the ultimate addition to your festive table. As Easter approaches, families gather to celebrate with delicious food, and these cereal bars offer a delightful blend of flavors and textures. Perfectly crispy yet chewy, they will be a hit with both children and adults alike. With their fun combinations of cereals, nuts, and extras, these bars can be tailored to fit any palette or dietary restriction.
Every bite brings a satisfying crunch that seamlessly melds with chewy, gooey goodness. Picture a brunch spread that includes bright-colored eggs, beautifully baked goods, and, of course, your homemade cereal bars! These treats are not just snacks; they are an experience that brings joy and sweetness to your celebrations.
The versatility of these cereal bars makes them a go-to choice for Easter brunch. Whether you are hosting a cozy family gathering or an elaborate brunch with friends, you’ll find that they are easy to prepare, can be made in advance, and will keep everyone smiling. The delightful blend of flavors from ingredients like honey, chocolate, and peanut butter creates a perfect harmony that is both tasty and wholesome.
Let’s dive in and discover why making Cereal Bars this Easter will delight your guests and become a cherished tradition.
Why You’ll Love This Recipe
Cereal Bars are not only a delicious treat; they are also functional and adaptable, making them a staple for any gathering. Here are some reasons why you will adore this recipe:
1. Quick and Easy Preparation – With only a few simple ingredients, you can whip these bars up in no time.
2. Customizable Options – This recipe allows you to mix and match your favorite cereals, nuts, and other add-ins to personalize each batch.
3. Healthy Snack Alternative – Packed with whole grains and natural sweeteners, they make a nutritious choice when compared to traditional desserts.
4. Kid-Friendly – Kids love helping to mix ingredients and can even assist in the layering process.
5. Perfect for Any Occasion – Whether for Easter brunch, school snacks, or quick breakfast options, these cereal bars fit the bill.
6. Delicious Flavor Combinations – Incorporating delicious flavors and textures, these bars are a delightful snack that everyone will enjoy.
These factors make recipes like Cereal Bars popular choices for any occasion, ensuring that you are providing both taste and nutrition for your guests.
Preparation and Cooking Time
Preparing perfect Cereal Bars takes about 30 minutes, plus some additional time for cooling. Here’s a breakdown of the timing:
– Preparation Time: 10 minutes
– Cooking Time: 10 minutes
– Cooling Time: 10 minutes
– Total Time: 30 minutes
This recipe is simple enough for both novice and experienced cooks, making it an effortless addition to your Easter brunch menu.
Ingredients
– 2 cups rolled oats
– 1 cup crispy rice cereal
– 1/2 cup honey or maple syrup
– 1/2 cup nut butter (such as almond or peanut butter)
– 1/2 cup mixed nuts (chopped)
– 1/2 cup mini chocolate chips (optional)
– 1/2 teaspoon vanilla extract
– A pinch of salt
Step-by-Step Instructions
Creating fabulous Cereal Bars is a breeze if you follow these easy steps:
1. Preheat the Oven: Preheat your oven to 350°F (175°C) and line an 8×8 inch baking dish with parchment paper.
2. Mix Dry Ingredients: In a large bowl, combine rolled oats, crispy rice cereal, mixed nuts, and a pinch of salt. Stir until evenly dispersed.
3. Heat Wet Ingredients: In a saucepan over low heat, combine honey and nut butter. Stir until melted and well mixed, about 2-3 minutes.
4. Add Flavoring: Remove from heat and stir in the vanilla extract.
5. Combine Mixtures: Pour the melted mixture over the dry ingredients and mix until everything is well coated.
6. Add Chocolate Chips: If you desire extra sweetness, fold in the mini chocolate chips gently.
7. Spread Mixture: Transfer the mixture into the prepared baking dish. Press it down firmly with a spatula or your hands until it’s evenly distributed.
8. Bake: Bake in the preheated oven for about 10-12 minutes or until the edges are golden.
9. Cool: Remove from the oven and allow to cool in the pan for about 10 minutes, then transfer to a wire rack to cool completely.
10. Cut Bars: Once cooled, remove from the baking dish, cut into bars, and store in an airtight container.
These steps will guide you to create delicious cereal bars with minimal effort!
How to Serve
When it comes to serving your Cereal Bars at Easter brunch, presentation is key! Here are some tips to elevate their display:
1. Colorful Platter: Arrange the bars on a vibrant platter. Adding fresh fruits or flower garnishes can enhance the visual appeal.
2. Creative Decorations: Consider drizzling melted chocolate over the bars or adding colorful sprinkles for a festive touch.
3. Pairing Suggestions: Serve your bars alongside fresh fruit, yogurt, or a side of nut butter for added flavor.
4. Beverage Pairing: Complement the meal with refreshing beverages, such as herbal teas or fruit-infused water, for a complete experience.
By thoughtfully considering how to serve these bars, you can create an impressive and memorable visual feast for your guests this Easter brunch.
With their delightful crunch and chewiness, Cereal Bars are sure to be an amazing hit among your family and friends. Their simplicity makes them accessible, while their customizability allows you to infuse a personal touch, creating a memorable experience for all. Enjoy your Easter brunch with these delicious Cereal Bars!
Additional Tips
– Use Fresh Ingredients: Always use fresh nuts and nut butter for optimal flavor. Stale ingredients can affect the taste of your cereal bars.
– Measure Carefully: Accurate measurement of honey or maple syrup ensures the right texture. Too much can lead to overly sticky bars, while too little can make them crumbly.
– Experiment With Toppings: After baking, consider adding toppings like drizzled chocolate or shredded coconut for a special touch.
– Create Layer Variations: Try layering different types of cereals or seeds for added texture and flavor variety.
Recipe Variation
Make your Cereal Bars even more delightful by trying one of these variations:
1. Chocolate-Covered Cereal Bars: After baking, dip the cooled bars in melted chocolate for a decadent twist.
2. Dried Fruit Add-Ins: Incorporate dried fruits like cranberries or raisins for added sweetness and chewiness.
3. Savory Spin: Use savory ingredients like pumpkin seeds and nutritional yeast for a unique snack option.
4. Flavor Considerations: Experiment with flavored nut butters, such as cashew or sunbutter, for distinct tastes.
Freezing and Storage
– Storage: Keep your cereal bars in an airtight container at room temperature for up to one week.
– Freezing: To prolong freshness, freeze individual bars wrapped in plastic wrap or foil. They can last up to 3 months in the freezer. Just let them thaw at room temperature before enjoying.
Special Equipment
For making these cereal bars, you will need a few essential tools:
– Mixing bowls
– Parchment paper for lining the baking dish
– 8×8 inch baking dish
– Spatula or wooden spoon for mixing
– Saucepan for melting ingredients
Frequently Asked Questions
Can I make these cereal bars gluten-free?
Yes! Simply use gluten-free oats and ensure that any added cereal is also gluten-free.
How can I make these bars nut-free?
You can replace nut butter with sunbutter (sunflower seed butter) or try a seed blend.
What size can I cut the bars?
You can cut them into any size you prefer. Smaller pieces are great for kids and snacking, while larger pieces can work as a dessert.
Can I substitute the honey?
Absolutely! Maple syrup can be used as a direct substitute for honey if you prefer a vegan option.
How long do these bars last?
If stored properly, they can last about one week at room temperature and up to three months in the freezer.
Conclusion
Cereal Bars: A Crunchy and Chewy Snack Perfect for Easter Brunch are an ideal complement to your festive gathering. They not only enhance your brunch menu but also bring an enjoyable flavor and texture that appeals to everyone. Customizable and nutritious, these bars can become a standout treat at your Easter celebration—or any occasion. With easy preparation, delightful combinations, and a simple storage process, you’ll surely make these cereal bars a staple in your household.
Cereal Bars: An Amazing Ultimate Snack Recipe for Easter Brunch
- Total Time: 25 minutes
Ingredients
– 2 cups rolled oats
– 1 cup crispy rice cereal
– 1/2 cup honey or maple syrup
– 1/2 cup nut butter (such as almond or peanut butter)
– 1/2 cup mixed nuts (chopped)
– 1/2 cup mini chocolate chips (optional)
– 1/2 teaspoon vanilla extract
– A pinch of salt
Instructions
Creating fabulous Cereal Bars is a breeze if you follow these easy steps:
1. Preheat the Oven: Preheat your oven to 350°F (175°C) and line an 8×8 inch baking dish with parchment paper.
2. Mix Dry Ingredients: In a large bowl, combine rolled oats, crispy rice cereal, mixed nuts, and a pinch of salt. Stir until evenly dispersed.
3. Heat Wet Ingredients: In a saucepan over low heat, combine honey and nut butter. Stir until melted and well mixed, about 2-3 minutes.
4. Add Flavoring: Remove from heat and stir in the vanilla extract.
5. Combine Mixtures: Pour the melted mixture over the dry ingredients and mix until everything is well coated.
6. Add Chocolate Chips: If you desire extra sweetness, fold in the mini chocolate chips gently.
7. Spread Mixture: Transfer the mixture into the prepared baking dish. Press it down firmly with a spatula or your hands until it’s evenly distributed.
8. Bake: Bake in the preheated oven for about 10-12 minutes or until the edges are golden.
9. Cool: Remove from the oven and allow to cool in the pan for about 10 minutes, then transfer to a wire rack to cool completely.
10. Cut Bars: Once cooled, remove from the baking dish, cut into bars, and store in an airtight container.
These steps will guide you to create delicious cereal bars with minimal effort!
- Prep Time: 15 minutes
- Cook Time: 10 minutes
Nutrition
- Serving Size: 12 bars
- Calories: 150 kcal
- Fat: 6g
- Protein: 4g


