

Introduction
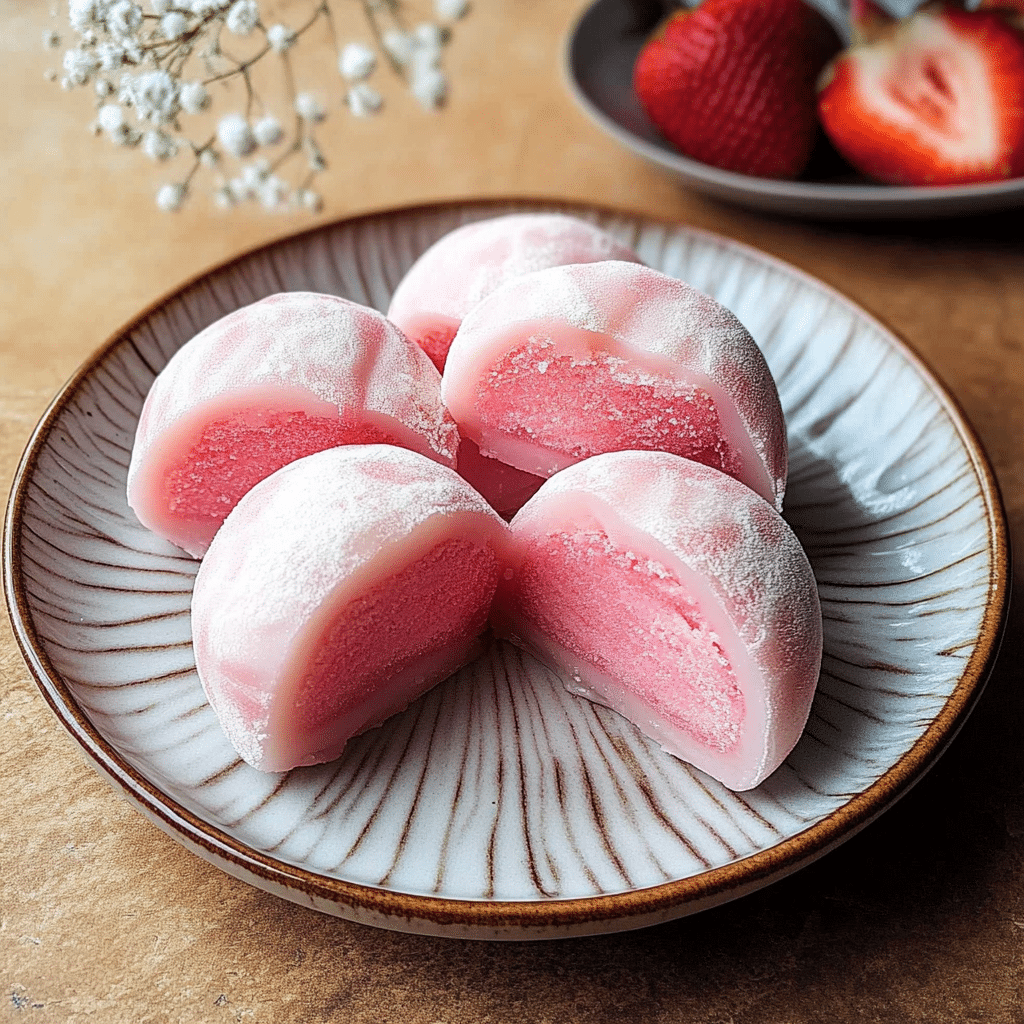
Vegan Strawberry Mochi Ice Cream is a delightful Japanese-inspired treat that combines the chewy texture of mochi with creamy, dairy-free strawberry ice cream. Encased in a soft, sweet rice dough, each bite offers a refreshing burst of strawberry flavor. The balance of fruity freshness and tender mochi makes it a perfectly satisfying dessert.
The first time I made this, I was surprised at how simple it was to recreate a favorite store-bought treat at home. Watching the mochi dough come together and wrapping it around the ice cream felt almost magical. Plus, the reaction from my family was priceless—they couldn’t believe it was homemade! The best part is that you can customize the filling with any dairy-free ice cream flavor you like.
Making mochi ice cream at home may seem intimidating, but it’s easier than you think. With just a few basic ingredients and a little practice, you’ll be rolling out soft, pillowy mochi in no time. Whether you’re hosting a party or simply craving a sweet treat, these Vegan Strawberry Mochi Ice Cream bites are guaranteed to impress!
Perfect for:
- Hot summer days
- Fun dessert projects
- Sharing with friends and family
- Parties and gatherings
- Strawberry lovers
Why You’ll Love This Vegan Strawberry Mochi Ice Cream
Here’s why Vegan Strawberry Mochi Ice Cream will become your go-to dessert:
- Soft and Chewy Mochi Layer: The mochi dough is perfectly soft and chewy, creating a satisfying contrast with the creamy ice cream filling.
- Creamy Dairy-Free Ice Cream: The strawberry ice cream is made from plant-based ingredients, making this dessert 100% vegan and delicious.
- Burst of Fresh Strawberry Flavor: Fresh strawberries give the ice cream a bright, fruity flavor.
- Easy to Customize: You can change the flavor of the ice cream or add other fruits for a twist on the classic strawberry version.
- Make-Ahead Friendly: These can be made in advance and stored in the freezer for a quick treat anytime.
Preparation and Cooking Time
- Total Time: 3 hours (including freezing time)
- Preparation Time: 30 minutes
- Cooking Time: 10 minutes
- Freezing Time: 2.5 hours
- Servings: 8 mochi pieces
- Calories per serving: Approximately 130 calories
- Key Nutrients: Carbs: 28g, Fat: 3g, Protein: 1g
Ingredients
For the Strawberry Ice Cream:
- 1 ½ cups fresh strawberries, hulled and diced
- 1 cup full-fat coconut milk (canned)
- ¼ cup maple syrup (adjust to taste)
- 1 teaspoon vanilla extract
- 1 tablespoon lemon juice
For the Mochi Dough:
- 1 cup glutinous rice flour (sweet rice flour)
- ¾ cup water
- ¼ cup granulated sugar
- ½ cup cornstarch or potato starch (for dusting)
Ingredient Highlights
- Strawberries: Fresh strawberries provide a natural, fruity sweetness and a beautiful pink color.
- Coconut Milk: This gives the ice cream a rich, creamy texture without dairy.
- Glutinous Rice Flour: Also known as sweet rice flour, this is the key ingredient for making chewy mochi.
- Maple Syrup: A natural sweetener that enhances the flavor of the strawberries.
Step-by-Step Instructions
Here’s how to make Vegan Strawberry Mochi Ice Cream:
Prepare the Vegan Strawberry Ice Cream:
- Blend the Ingredients: Combine the strawberries, coconut milk, maple syrup, vanilla extract, and lemon juice in a blender. Blend until smooth and creamy.
- Chill the Mixture: Pour the mixture into an ice cream maker and churn according to the manufacturer’s instructions. If you don’t have an ice cream maker, pour the mixture into a shallow container and freeze for 1-2 hours, stirring every 30 minutes until it reaches a scoopable consistency.
- Form Ice Cream Balls: Once the ice cream is set, scoop it into 8 small balls (about 1.5 inches in diameter). Place them on a lined baking sheet and freeze for at least 1 hour or until firm.
Make the Mochi Dough:
- Mix the Ingredients: In a microwave-safe bowl, whisk together the glutinous rice flour, sugar, and water until smooth.
- Cook the Dough: Microwave the mixture for 1 minute. Stir well, then microwave for another 1 minute. Stir again and microwave for 30 seconds until the dough is translucent and sticky.
- Dust and Knead: Generously dust a clean surface with cornstarch. Transfer the cooked dough onto the surface and sprinkle more cornstarch on top. Gently knead the dough for 1-2 minutes until it’s cool enough to handle.
Assemble the Mochi Ice Cream:
- Roll Out the Dough: Roll out the mochi dough into a thin sheet, about ¼ inch thick. Use a round cutter (about 4 inches in diameter) to cut out circles.
- Wrap the Ice Cream: Place an ice cream ball in the center of each mochi circle. Carefully wrap the dough around the ice cream, pinching the edges to seal.
- Freeze: Place the wrapped mochi ice cream back in the freezer for at least 1 hour to firm up before serving.
How to Serve Vegan Strawberry Mochi Ice Cream
Vegan Strawberry Mochi Ice Cream is best served slightly softened. Here are some ways to enjoy it:
- On Its Own: Let the mochi sit at room temperature for a few minutes before eating for the best texture.
- With Fresh Berries: Serve alongside fresh strawberries or other berries for a colorful presentation.
- As a Party Treat: Arrange on a platter and let guests help themselves.
- With Matcha Tea: Pair with hot or iced matcha for a perfect flavor contrast.
Additional Tips for Vegan Strawberry Mochi Ice Cream
Here are some tips for perfect Vegan Strawberry Mochi Ice Cream:
- Work Quickly: When wrapping the ice cream, work quickly to prevent it from melting.
- Dust Generously: Use plenty of cornstarch to prevent the mochi dough from sticking to your hands and work surface.
- Don’t Overfill: Avoid overfilling the mochi dough to prevent it from tearing.
- Use a Cookie Cutter: A round cookie cutter ensures evenly sized mochi pieces.
- Experiment with Flavors: Try different fruits or even green tea for a unique twist.
- Store Properly: Keep the mochi ice cream in an airtight container in the freezer to prevent freezer burn.
Recipe Variations for Vegan Strawberry Mochi Ice Cream
Here are 10 variations you can try for Vegan Strawberry Mochi Ice Cream:
- Mango Mochi Ice Cream: Swap the strawberries for fresh mango.
- Matcha Mochi Ice Cream: Add 1 teaspoon of matcha powder to the ice cream mixture.
- Chocolate Mochi Ice Cream: Use vegan chocolate ice cream instead of strawberry.
- Blueberry Mochi Ice Cream: Replace strawberries with blueberries for a tangy twist.
- Peach Mochi Ice Cream: Use ripe peaches for a summery version.
- Raspberry Mochi Ice Cream: Add raspberries for a tart flavor.
- Pineapple Coconut Mochi Ice Cream: Blend fresh pineapple with coconut milk for a tropical treat.
- Lychee Mochi Ice Cream: Use canned lychee for a floral, exotic flavor.
- Mixed Berry Mochi Ice Cream: Combine different berries for a multi-flavored experience.
- Vanilla Bean Mochi Ice Cream: Keep it simple with vanilla bean ice cream.
Freezing and Storage for Vegan Strawberry Mochi Ice Cream
- Freezing: Wrap each mochi ice cream in plastic wrap and store in an airtight container in the freezer for up to 1 month.
- Storage: Let the mochi thaw for 2-3 minutes before eating for the best texture.
Special Equipment for Vegan Strawberry Mochi Ice Cream
- Blender or Food Processor: For blending the ice cream ingredients.
- Ice Cream Maker (Optional): To churn the ice cream for a smoother texture.
- Microwave-Safe Bowl: For cooking the mochi dough.
- Rolling Pin: For rolling out the mochi dough.
- Round Cookie Cutter: To cut even circles of dough.
- Baking Sheet: For freezing the ice cream balls.
- Plastic Wrap – Helps wrap and shape the mochi ice cream without sticking.
- Silicone Spatula – For stirring and folding the mochi dough without sticking.
- Parchment Paper – Prevents the mochi from sticking while shaping.
Frequently Asked Questions for Vegan Strawberry Mochi Ice Cream
- Can I use another plant-based milk?
Yes, but full-fat coconut milk provides the creamiest texture. Almond or oat milk will work but may result in a less creamy ice cream. - What is glutinous rice flour?
Glutinous rice flour is made from sticky rice. Despite the name, it doesn’t contain gluten. It’s essential for making chewy mochi. - Can I skip the ice cream maker?
Yes! You can freeze the blended ice cream mixture and stir it every 30 minutes until it reaches the desired consistency. - How long does the mochi last in the freezer?
Up to 1 month if stored properly. - Can I use frozen strawberries?
Yes, just thaw and drain them before blending to avoid excess moisture.

Vegan Strawberry Mochi Ice Cream
- Total Time: 3 hours (including freezing time)
- Yield: 8 servings 1x
Description
Vegan Strawberry Mochi Ice Cream is a delightful Japanese-inspired treat that combines the chewy texture of mochi with creamy, dairy-free strawberry ice cream. Encased in a soft, sweet rice dough, each bite offers a refreshing burst of strawberry flavor. This homemade version is surprisingly easy to make and will impress your friends and family with its authentic taste and vibrant appearance.
Ingredients
For the Strawberry Ice Cream:
- 1 ½ cups fresh strawberries, hulled and diced
- 1 cup full-fat coconut milk (canned)
- ¼ cup maple syrup (adjust to taste)
- 1 teaspoon vanilla extract
- 1 tablespoon lemon juice
For the Mochi Dough:
- 1 cup glutinous rice flour (sweet rice flour)
- ¾ cup water
- ¼ cup granulated sugar
- ½ cup cornstarch or potato starch (for dusting)
Ingredient Highlights
- Strawberries: Fresh strawberries provide a natural, fruity sweetness and a beautiful pink color.
- Coconut Milk: This gives the ice cream a rich, creamy texture without dairy.
- Glutinous Rice Flour: Also known as sweet rice flour, this is the key ingredient for making chewy mochi.
- Maple Syrup: A natural sweetener that enhances the flavor of the strawberries.
Instructions
Prepare the Vegan Strawberry Ice Cream:
- Blend the Ingredients: Combine the strawberries, coconut milk, maple syrup, vanilla extract, and lemon juice in a blender. Blend until smooth and creamy.
- Chill the Mixture: Pour the mixture into an ice cream maker and churn according to the manufacturer’s instructions. If you don’t have an ice cream maker, pour the mixture into a shallow container and freeze for 1-2 hours, stirring every 30 minutes until it reaches a scoopable consistency.
- Form Ice Cream Balls: Once the ice cream is set, scoop it into 8 small balls (about 1.5 inches in diameter). Place them on a lined baking sheet and freeze for at least 1 hour or until firm.
Make the Mochi Dough:
- Mix the Ingredients: In a microwave-safe bowl, whisk together the glutinous rice flour, sugar, and water until smooth.
- Cook the Dough: Microwave the mixture for 1 minute. Stir well, then microwave for another 1 minute. Stir again and microwave for 30 seconds until the dough is translucent and sticky.
- Dust and Knead: Generously dust a clean surface with cornstarch. Transfer the cooked dough onto the surface and sprinkle more cornstarch on top. Gently knead the dough for 1-2 minutes until it’s cool enough to handle.
Assemble the Mochi Ice Cream:
- Roll Out the Dough: Roll out the mochi dough into a thin sheet, about ¼ inch thick. Use a round cutter (about 4 inches in diameter) to cut out circles.
- Wrap the Ice Cream: Place an ice cream ball in the center of each mochi circle. Carefully wrap the dough around the ice cream, pinching the edges to seal.
- Freeze: Place the wrapped mochi ice cream back in the freezer for at least 1 hour to firm up before serving.
- Prep Time: 30 minutes
- Freezing Time: 2.5 hours
- Cook Time: 10 minutes
Nutrition
- Calories: 130 kcal
- Fat: 3g
- Carbohydrates: 28g
- Protein: 1g
Conclusion
Vegan Strawberry Mochi Ice Cream is a refreshing, chewy, and creamy treat that’s perfect for any occasion. Wrapped in a soft, pillowy mochi exterior and filled with luscious strawberry ice cream, this delightful dessert offers a burst of fruity flavor in every bite. It’s a fun, unique way to satisfy your sweet cravings while staying completely plant-based.
This recipe is surprisingly easy to make and ideal for sharing—or savoring solo! Whether you’re treating yourself or wowing your friends with homemade mochi ice cream, it’s bound to become a go-to favorite.
I’d love to see your Vegan Strawberry Mochi Ice Cream creations! Snap a photo, share it on social media, and don’t forget to tag me. Enjoy every bite of this chewy, creamy delight! Happy cooking!


