
Introduction
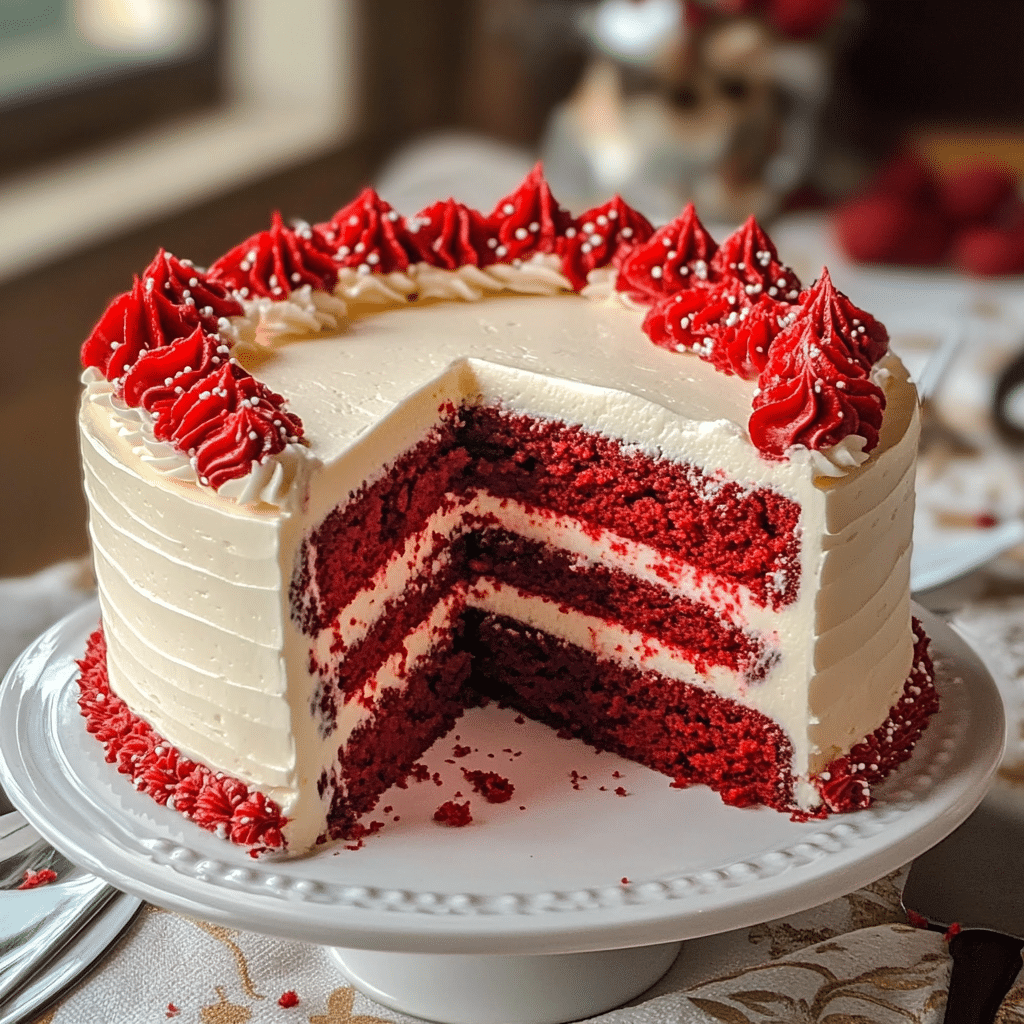
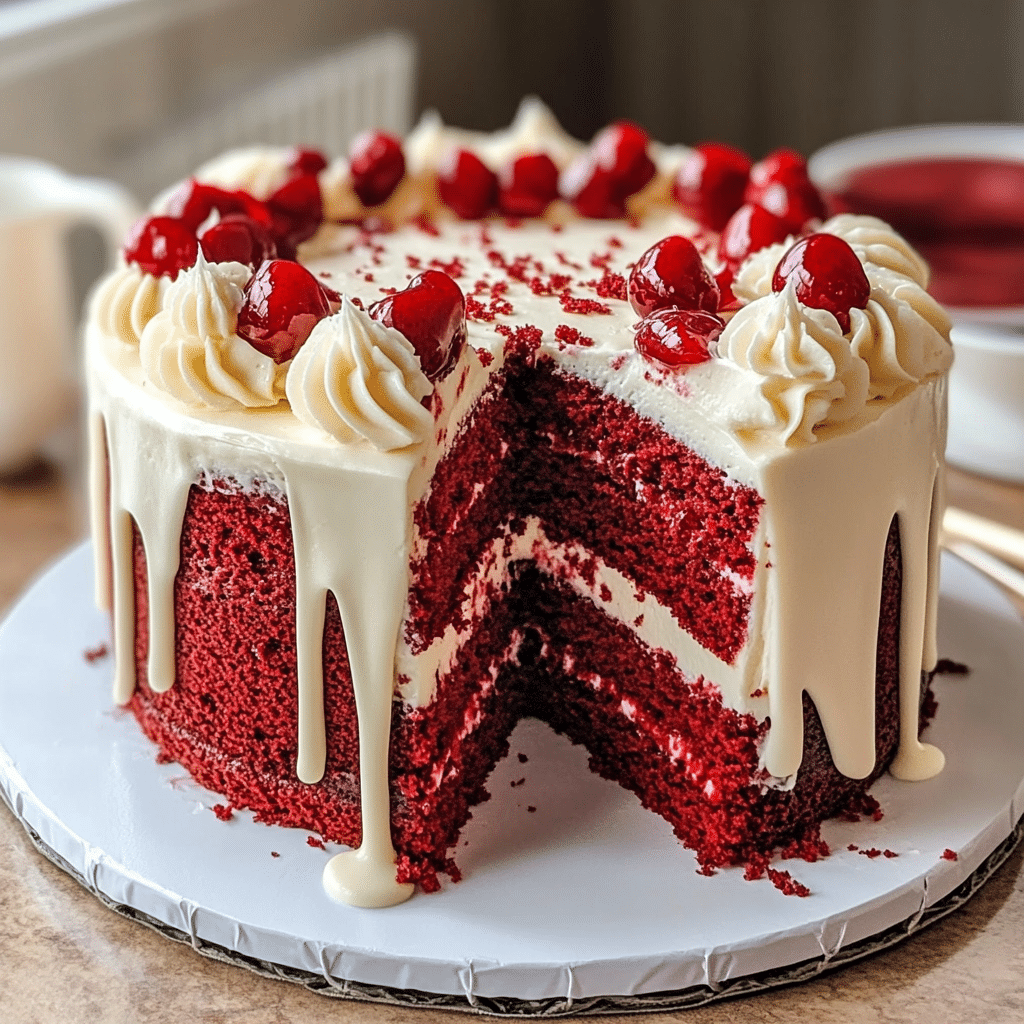
Red Velvet Dream Cake is the ultimate dessert for lovers of classic red velvet. This towering cake features layers of soft, moist red velvet sponge, generously coated with a luscious cream cheese frosting. Its vibrant red hue, paired with its rich and tangy flavor, makes it a show-stopping centerpiece for any occasion.
I first made this cake for a special celebration, and it instantly became a crowd favorite. The combination of the smooth cream cheese frosting and the slightly cocoa-flavored cake creates a balance that’s simply irresistible. It’s the kind of dessert that looks as amazing as it tastes, and the layers are perfect for showing off at any gathering.
Whether you’re celebrating a birthday, holiday, or just indulging your sweet tooth, this cake is the perfect choice for a dreamy dessert experience. Every slice feels like a treat, and the beauty of the cake makes it a memorable addition to any event.
Perfect for:
- Birthdays
- Weddings
- Holidays
- Special celebrations
- Red velvet enthusiasts
Why You’ll Love This Red Velvet Dream Cake
Here’s why Red Velvet Dream Cake will become your favorite dessert:
- Moist and Velvety Texture: Buttermilk and oil make the cake irresistibly soft and tender, with a melt-in-your-mouth crumb.
- Classic Flavor: The perfect balance of cocoa and vanilla with a slight tang creates a rich, authentic red velvet flavor.
- Cream Cheese Frosting: The tangy-sweet frosting complements the cake perfectly, adding richness without overpowering.
- Stunning Presentation: The vibrant red layers and creamy frosting make this cake visually impressive.
- Versatile and Customizable: Easily adapt the recipe for different occasions by adding decorations or flavors.
Preparation and Cooking Time
- Total Time: 2 hours
- Preparation Time: 30 minutes
- Cooking Time: 25-30 minutes
- Cooling and Assembly Time: 1 hour
- Servings: 12-16 slices
- Calories per serving: Approximately 350-400 calories
- Key Nutrients: Protein: 5g, Carbs: 48g, Fat: 18g
Ingredients
Gather these ingredients to make your Red Velvet Dream Cake:
Cake:
- 2 ½ cups all-purpose flour
- 1 teaspoon baking soda
- 1 teaspoon baking powder
- ½ teaspoon salt
- 2 tablespoons cocoa powder
- 1 ½ cups granulated sugar
- 1 cup vegetable oil
- 2 large eggs
- 1 cup buttermilk
- 1 tablespoon white vinegar
- 2 teaspoons vanilla extract
- 1-2 tablespoons red food coloring (gel recommended)
Cream Cheese Frosting:
- 16 oz cream cheese, softened
- 1 cup unsalted butter, softened
- 4 cups powdered sugar
- 2 teaspoons vanilla extract
Ingredient Highlights
- Buttermilk and Vinegar: These key ingredients give red velvet its characteristic tang and soft texture.
- Cocoa Powder: A subtle amount of cocoa provides the signature mild chocolate flavor without overpowering the cake.
- Red Food Coloring: Adds the iconic red hue, making the cake visually stunning.
- Cream Cheese: Creates the rich, tangy frosting that pairs perfectly with the cake.
Step-by-Step Instructions
Here’s how to make this recipe:
Prepare the Cake Layers:
- Preheat the Oven: Preheat your oven to 350°F (175°C). Grease and line three 8-inch round cake pans with parchment paper.
- Mix the Dry Ingredients: In a medium bowl, whisk together the flour, baking soda, baking powder, salt, and cocoa powder. Set aside.
- Combine Wet Ingredients: In a large mixing bowl, beat the sugar and vegetable oil until well combined. Add the eggs, one at a time, followed by the vanilla extract.
- Add the Buttermilk and Food Coloring: Gradually mix in the buttermilk, vinegar, and red food coloring, ensuring the batter reaches your desired shade of red.
- Incorporate Dry Ingredients: Gradually add the dry ingredients to the wet mixture, mixing until just combined. Avoid overmixing to maintain a tender crumb.
- Divide and Bake: Evenly divide the batter among the prepared cake pans. Bake for 25-30 minutes or until a toothpick inserted into the center comes out clean.
- Cool the Cakes: Let the cakes cool in the pans for 10 minutes, then transfer them to a wire rack to cool completely.
Make the Cream Cheese Frosting:
- Cream the Butter and Cream Cheese: In a large mixing bowl, beat the softened butter and cream cheese together until smooth and creamy.
- Add the Powdered Sugar: Gradually mix in the powdered sugar, one cup at a time, until fully incorporated. Add the vanilla extract and beat until fluffy.
Assemble the Cake:
- Level the Cake Layers: If necessary, use a serrated knife to level the tops of the cake layers for even stacking.
- Frost the Layers: Place one cake layer on a serving plate or cake stand. Spread a generous layer of frosting on top. Repeat with the second and third layers.
- Frost the Outside: Use a spatula to spread a thin crumb coat around the entire cake. Chill for 15 minutes, then apply the final layer of frosting.
- Decorate: Decorate as desired with red velvet crumbs, sprinkles, or edible flowers.
How to Serve Red Velvet Dream Cake
Red Velvet Dream Cake can be served in many ways:
- As a Showstopper Dessert: Serve as the centerpiece for any special occasion.
- With Coffee or Tea: Pair with your favorite hot beverage for a cozy treat.
- With Fresh Fruit: Garnish with fresh berries for an elegant presentation.
- A La Mode: Serve slices with a scoop of vanilla ice cream for an indulgent treat.
Additional Tips for Red Velvet Dream Cake
Here are some tips to ensure this recipe is perfect every time:
- Use Gel Food Coloring: Gel provides a more vibrant color without altering the batter’s consistency.
- Don’t Overmix: Overmixing the batter can lead to a dense cake, so mix just until combined.
- Chill the Frosting: If the frosting becomes too soft, refrigerate it for 15-20 minutes before spreading.
- Use Room-Temperature Ingredients: For best results, ensure all ingredients are at room temperature before mixing.
- Level the Layers: Leveling the cake layers ensures even stacking and a professional appearance.
Recipe Variations for Red Velvet Dream Cake
Here are 10 variations you can try for this recipe:
- Red Velvet Dream Cake with Chocolate Frosting: Swap the cream cheese frosting for rich chocolate frosting.
- Red Velvet Dream Cake with Raspberry Filling: Add a layer of raspberry jam or fresh raspberries between each layer.
- Naked Red Velvet Dream Cake: Skip the full frosting and opt for a minimal “naked” cake look with just a crumb coat.
- Red Velvet Dream Cake with White Chocolate Drip: Drizzle melted white chocolate over the frosted cake for a dramatic effect.
- Red Velvet Cheesecake Cake: Alternate layers of red velvet cake with cheesecake for a decadent twist.
- Gluten-Free Red Velvet Dream Cake: Use a gluten-free flour blend to make the cake gluten-free.
- Mini Red Velvet Dream Cakes: Bake the batter in mini cake pans for individual-sized cakes.
- Red Velvet Ice Cream Cake: Layer the cake with vanilla ice cream for a frozen dessert.
- Spiced Red Velvet Dream Cake: Add a pinch of cinnamon and nutmeg to the batter for a warm, spiced flavor.
- Vegan Red Velvet Dream Cake: Substitute plant-based ingredients for a vegan version.
Freezing and Storage for Red Velvet Dream Cake
- Freezing: Wrap unfrosted cake layers tightly in plastic wrap and store in the freezer for up to 3 months. Thaw at room temperature before frosting.
- Storage: Store the assembled cake in the refrigerator for up to 5 days. Let it come to room temperature before serving.
Special Equipment for Red Velvet Dream Cake
Here are some special tools to make preparing this recipe easier:
- Electric Mixer: A stand or hand mixer is essential for smooth batter and frosting.
- Cake Pans: Three 8-inch or 9-inch round pans ensure evenly baked layers.
- Offset Spatula: Ideal for spreading frosting evenly.
- Cooling Racks: Essential for cooling the cakes before frosting.
- Cake Leveler: For leveling the cake layers.
- Cake Stand: Makes frosting and serving the cake easier and more elegant.
Frequently Asked Questions for Red Velvet Dream Cake
- Can I make this cake ahead of time?
Yes, bake the cake layers in advance and store them in the fridge or freezer until ready to assemble. - Can I use a different frosting?
Absolutely! Buttercream, whipped cream, or chocolate ganache also work beautifully. - How do I get vibrant red color?
Use gel food coloring for a deeper, more vibrant red. - Can I make this cake gluten-free?
Yes, use a gluten-free flour blend to make the cake gluten-free. - What if I don’t have buttermilk?
You can make a substitute by mixing 1 tablespoon of vinegar or lemon juice with 1 cup of milk. Let it sit for 5 minutes before using.

Red Velvet Dream Cake
- Total Time: 2 hours
- Yield: 12–16 servings 1x
Description
Red Velvet Dream Cake is the ultimate dessert for lovers of classic red velvet. This towering cake features layers of soft, moist red velvet sponge, generously coated with a luscious cream cheese frosting. Its vibrant red hue, paired with its rich and tangy flavor, makes it a show-stopping centerpiece for any occasion. Whether you’re celebrating a birthday, holiday, or just indulging your sweet tooth, this cake is the perfect choice for a dreamy dessert experience.
Ingredients
For the Cake:
- 2 ½ cups all-purpose flour
- 1 teaspoon baking soda
- 1 teaspoon baking powder
- ½ teaspoon salt
- 2 tablespoons cocoa powder
- 1 ½ cups granulated sugar
- 1 cup vegetable oil
- 2 large eggs
- 1 cup buttermilk
- 1 tablespoon white vinegar
- 2 teaspoons vanilla extract
- 1–2 tablespoons red food coloring (gel recommended)
For the Cream Cheese Frosting:
- 16 oz cream cheese, softened
- 1 cup unsalted butter, softened
- 4 cups powdered sugar
- 2 teaspoons vanilla extract
Ingredient Highlights
- Buttermilk and Vinegar: These key ingredients give red velvet its characteristic tang and soft texture.
- Cocoa Powder: A subtle amount of cocoa provides the signature mild chocolate flavor without overpowering the cake.
- Red Food Coloring: Adds the iconic red hue, making the cake visually stunning.
- Cream Cheese: Creates the rich, tangy frosting that pairs perfectly with the cake.
Instructions
Prepare the Cake Layers:
- Preheat the Oven: Preheat your oven to 350°F (175°C). Grease and line three 8-inch round cake pans with parchment paper.
- Mix the Dry Ingredients: In a medium bowl, whisk together the flour, baking soda, baking powder, salt, and cocoa powder. Set aside.
- Combine Wet Ingredients: In a large mixing bowl, beat the sugar and vegetable oil until well combined. Add the eggs, one at a time, followed by the vanilla extract.
- Add the Buttermilk and Food Coloring: Gradually mix in the buttermilk, vinegar, and red food coloring, ensuring the batter reaches your desired shade of red.
- Incorporate Dry Ingredients: Gradually add the dry ingredients to the wet mixture, mixing until just combined. Avoid overmixing to maintain a tender crumb.
- Divide and Bake: Evenly divide the batter among the prepared cake pans. Bake for 25-30 minutes or until a toothpick inserted into the center comes out clean.
- Cool the Cakes: Let the cakes cool in the pans for 10 minutes, then transfer them to a wire rack to cool completely.
Make the Cream Cheese Frosting:
- Cream the Butter and Cream Cheese: In a large mixing bowl, beat the softened butter and cream cheese together until smooth and creamy.
- Add the Powdered Sugar: Gradually mix in the powdered sugar, one cup at a time, until fully incorporated. Add the vanilla extract and beat until fluffy.
Assemble the Cake:
- Level the Cake Layers: If necessary, use a serrated knife to level the tops of the cake layers for even stacking.
- Frost the Layers: Place one cake layer on a serving plate or cake stand. Spread a generous layer of frosting on top. Repeat with the second and third layers.
- Frost the Outside: Use a spatula to spread a thin crumb coat around the entire cake. Chill for 15 minutes, then apply the final layer of frosting.
- Decorate: Decorate as desired with red velvet crumbs, sprinkles, or edible flowers.
- Prep Time: 30 minutes
- Cook Time: 25-30 minutes
Nutrition
- Calories: 350-400 kcal
- Fat: 18g
- Carbohydrates: 48g
- Protein: 5g
Conclusion
Red Velvet Dream Cake is the perfect dessert for any occasion, offering a rich, vibrant, and flavorful experience. Its stunning appearance and indulgent taste make it a guaranteed crowd-pleaser. Whether you’re celebrating a milestone or simply treating yourself, this cake is a dream come true for red velvet lovers.
This recipe is as delightful to prepare as it is to enjoy, making it ideal for everything from family celebrations to intimate gatherings. The moist texture, rich flavor, and beautiful layers are sure to make every slice a memorable experience.
I’d love to see how your Red Velvet Dream Cake turns out! Snap a photo, share it on social media, and don’t forget to tag me—I can’t wait to see your delicious creations. Happy baking!


