

Introduction
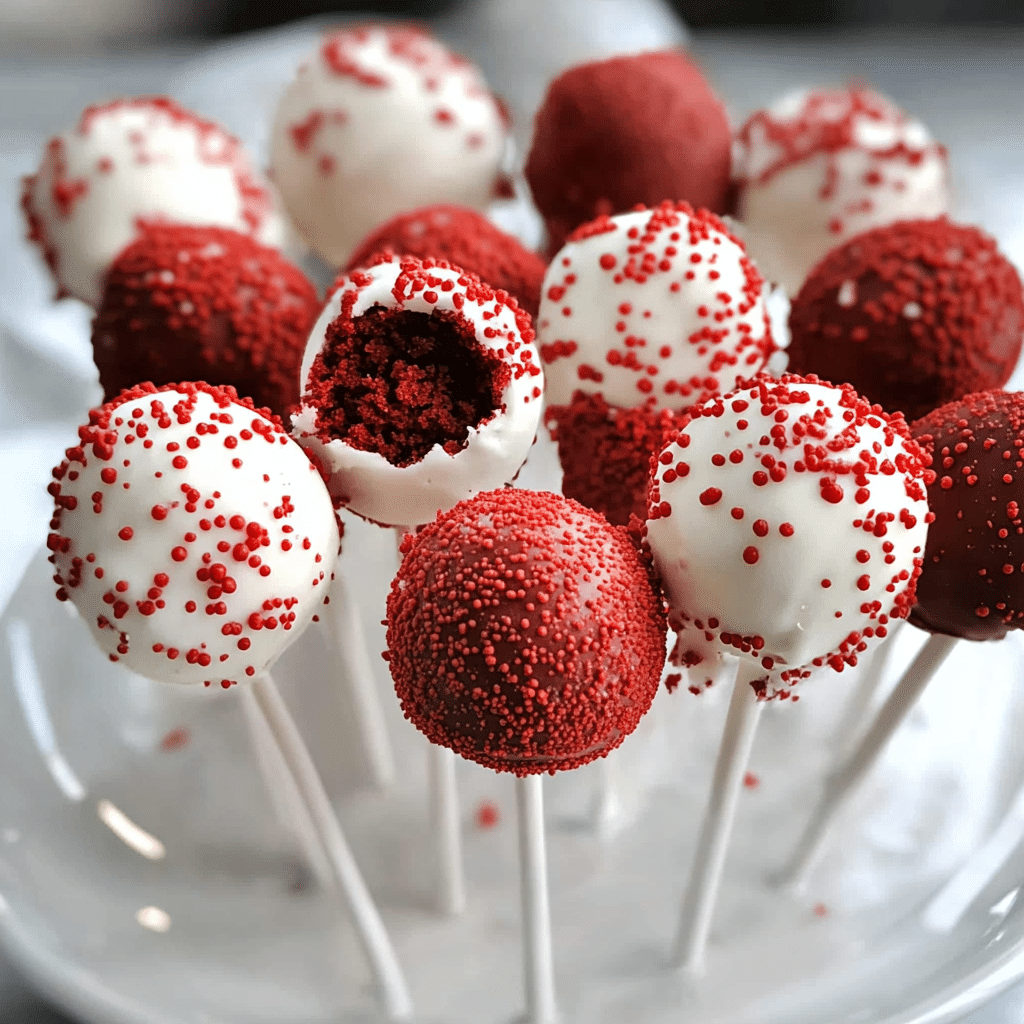
Red Velvet Cake Pops are a fun, bite-sized version of the classic red velvet cake. These delightful treats are made by combining moist red velvet cake with rich cream cheese frosting, forming them into bite-sized balls, and coating them in a smooth chocolate shell. Not only are they incredibly delicious, but they’re also a beautiful and portable dessert perfect for parties, gifts, or satisfying your sweet tooth on the go. Their striking red interior and crisp chocolate coating make them a real showstopper at any gathering.
I remember making these for a friend’s birthday, and they were an instant hit. The best thing about cake pops is how customizable they are—you can decorate them with sprinkles, drizzle them with white chocolate, or even add edible glitter for an extra touch of glam. Plus, the combination of soft cake and crunchy chocolate shell creates the perfect texture in every bite.
What’s great about these cake pops is that they’re surprisingly easy to make at home. Whether you use a homemade red velvet cake or a store-bought one to save time, the process is simple and fun. Serve them at parties, wrap them up as gifts, or keep a batch in the fridge for a quick, indulgent treat!
Perfect for:
- Birthday parties
- Holiday dessert tables
- Gift-giving
- Weddings and showers
- Valentine’s Day treats
Why You’ll Love This Red Velvet Cake Pops
Here’s why Red Velvet Cake Pops will be your new go-to treat:
- Moist and Flavorful: Each bite combines the signature cocoa-infused red velvet cake with a rich, tangy cream cheese frosting.
- Visually Stunning: The vibrant red interior and glossy chocolate shell make them both eye-catching and appetizing.
- Portable and Easy to Eat: No need for forks or plates—these cake pops are perfect for parties and events.
- Customizable: Decorate with sprinkles, drizzle with white chocolate, or tint the coating to match any theme or occasion.
- Make-Ahead Friendly: These cake pops can be made in advance and stored, making them convenient for busy schedules.
Preparation and Cooking Time
- Total Time: 3 hours (including cooling and chilling)
- Preparation Time: 30 minutes
- Cooking Time: 25-30 minutes
- Cooling and Chilling Time: 2 hours
- Servings: 24 cake pops
- Calories per serving: Approximately 150 calories
- Key Nutrients: Protein: 2g, Carbs: 20g, Fat: 7g
Ingredients
Gather these ingredients to make your Red Velvet Cake Pops:
For the Cake:
- 1 ½ cups all-purpose flour
- 1 tablespoon unsweetened cocoa powder
- 1 teaspoon baking powder
- ½ teaspoon baking soda
- ½ teaspoon salt
- ½ cup unsalted butter, softened
- 1 cup granulated sugar
- 2 large eggs
- 1 teaspoon vanilla extract
- 1 tablespoon red food coloring
- ½ cup buttermilk
- 1 teaspoon white vinegar
Frosting:
- 4 ounces cream cheese, softened
- 2 tablespoons unsalted butter, softened
- 1 ½ cups powdered sugar
- 1 teaspoon vanilla extract
Coating:
- 12 ounces white or semi-sweet chocolate (or candy melts)
- 1 tablespoon vegetable oil (optional, for thinning the coating)
- Sprinkles or other decorations (optional)
Ingredient Highlights
- Red Food Coloring: Essential for the signature red velvet color—use gel food coloring for a more vibrant hue without altering the texture of the cake.
- Buttermilk and Vinegar: These ingredients enhance the cake’s flavor and tenderness while giving it a slightly tangy edge.
- Cream Cheese Frosting: This rich, tangy frosting perfectly complements the moist red velvet cake and acts as the glue that holds the cake pops together.
- Chocolate Coating: Use white or dark chocolate, depending on your preference. Candy melts are also a great option for a fuss-free coating.
Step-by-Step Instructions
Here’s how to make Red Velvet Cake Pops:
Prepare the Cake:
- Preheat the Oven: Preheat your oven to 350°F (175°C). Grease and flour an 8×8-inch baking pan or line it with parchment paper.
- Mix the Dry Ingredients: In a medium bowl, whisk together the flour, cocoa powder, baking powder, baking soda, and salt. Set aside.
- Cream the Butter and Sugar: In a large mixing bowl, beat the softened butter and sugar with an electric mixer until light and fluffy, about 2-3 minutes.
- Add the Eggs and Vanilla: Beat in the eggs one at a time, followed by the vanilla extract and red food coloring.
- Add the Buttermilk and Vinegar: Mix in the buttermilk and vinegar, alternating with the dry ingredients, until the batter is smooth and well combined.
- Bake the Cake: Pour the batter into the prepared pan and bake for 25-30 minutes, or until a toothpick inserted in the center comes out clean. Let the cake cool completely.
Prepare the Cake Pops:
- Crumble the Cake: Once the cake is cool, crumble it into fine crumbs using your hands or a fork.
- Make the Frosting: In a medium bowl, beat the cream cheese, butter, powdered sugar, and vanilla extract until smooth and creamy.
- Combine Cake and Frosting: Add the frosting to the crumbled cake, a little at a time, until the mixture holds together when pressed. You may not need all of the frosting.
- Shape into Balls: Roll the mixture into 1-inch balls and place them on a baking sheet lined with parchment paper. Chill in the refrigerator for at least 1 hour, or freeze for 20-30 minutes, until firm.
Coat the Cake Pops:
- Melt the Chocolate: Melt the chocolate or candy melts in a microwave-safe bowl, stirring every 30 seconds until smooth. Add vegetable oil if the coating is too thick.
- Dip the Cake Pops: Insert a lollipop stick into each cake ball and dip it into the melted chocolate, turning to coat evenly. Tap off excess coating and place the cake pop upright on a piece of styrofoam or a cake pop stand.
- Decorate: While the coating is still wet, add sprinkles or other decorations if desired.
- Chill: Allow the cake pops to set completely at room temperature or in the refrigerator.
How to Serve Red Velvet Cake Pops
Red Velvet Cake Pops can be served in a variety of ways:
- Party Display: Arrange them in a decorative stand or styrofoam block for a professional-looking presentation.
- Gift Boxes: Wrap the cake pops individually in cellophane and tie them with ribbons for a thoughtful homemade gift.
- Dessert Buffet: Add them to a dessert table alongside other small treats for an eye-catching display.
- Holiday Treat: Serve these cake pops at holiday parties as a festive and easy-to-eat dessert.
Additional Tips for Red Velvet Cake Pops
Here are some tips to make perfect Red Velvet Cake Pops:
- Chill Thoroughly: Chilling the cake balls ensures they stay firm and won’t fall apart during coating.
- Use Candy Melts for Easy Coating: Candy melts are designed for dipping and offer a smooth, fuss-free finish.
- Thin the Coating: Add a little vegetable oil or coconut oil to the melted chocolate to make it easier to dip.
- Decorate Quickly: Add sprinkles or decorations while the coating is still wet to ensure they stick.
- Freeze for Longer Storage: Cake pops can be frozen for up to 3 months. Thaw in the refrigerator before serving.
Recipe Variations for Red Velvet Cake Pops
Here are 10 variations for Red Velvet Cake Pops:
- Red Velvet Cheesecake Pops: Add a bit of cheesecake filling for an extra creamy center.
- Chocolate-Dipped Red Velvet Pops: Use dark chocolate for a more intense flavor contrast.
- Heart-Shaped Red Velvet Pops: Shape the cake balls into hearts for Valentine’s Day.
- Gluten-Free Red Velvet Pops: Substitute the all-purpose flour with a gluten-free flour blend.
- Peppermint Red Velvet Pops: Add a dash of peppermint extract for a holiday twist.
- Nutty Red Velvet Pops: Roll the cake pops in crushed nuts before the coating sets.
- Oreo Red Velvet Pops: Mix crushed Oreos into the frosting for added texture and flavor.
- Marbled Red Velvet Pops: Swirl two colors of coating for a marbled effect.
- Rainbow Sprinkles Pops: Cover the cake pops in rainbow sprinkles for a fun and festive look.
- Caramel Drizzle Pops: Drizzle with caramel for a decadent touch.
Freezing and Storage for Red Velvet Cake Pops
- Freezing: Cake pops freeze well. Place them in a single layer in an airtight container and freeze for up to 3 months. Thaw in the refrigerator before serving.
- Storage: Store cake pops in an airtight container at room temperature for 2-3 days, or in the refrigerator for up to a week.
Special Equipment for Red Velvet Cake Pops
Here’s what you’ll need to make Red Velvet Cake Pops:
- Electric Mixer: For mixing the cake batter and frosting.
- Baking Pan: An 8×8-inch pan for baking the cake.
- Parchment Paper: For lining the baking sheet and preventing sticking.
- Lollipop Sticks: For making the cake pops easy to eat.
- Microwave-Safe Bowl: For melting the chocolate coating.
- Cake Pop Stand or Styrofoam Block: To hold the cake pops upright while the coating sets.
- Cooling Rack: For cooling the cake before crumbling.
Frequently Asked Questions for Red Velvet Cake Pops
- Can I use a boxed cake mix?
Yes, a red velvet boxed mix works well and saves time. - Can I freeze the cake balls before dipping?
Absolutely. Freezing the cake balls makes dipping easier. - What can I use instead of lollipop sticks?
You can use pretzel sticks or paper straws as a fun alternative. - How do I prevent the coating from cracking?
Let the cake balls come to room temperature before dipping if they’re too cold. - Can I use white chocolate chips for coating?
Yes, but be sure to add a little vegetable oil for easier melting and dipping.

Red Velvet Cake Pops
- Total Time: 3 hours (including cooling and chilling)
- Yield: 24 servings 1x
Description
Red Velvet Cake Pops are a fun, bite-sized version of the classic red velvet cake. These delightful treats are made by combining moist red velvet cake with rich cream cheese frosting, forming them into bite-sized balls, and coating them in a smooth chocolate shell. Not only are they incredibly delicious, but they’re also a beautiful and portable dessert perfect for parties, gifts, or satisfying your sweet tooth on the go. Their striking red interior and crisp chocolate coating make them a real showstopper at any gathering.
Ingredients
For the Cake:
- 1 ½ cups all-purpose flour
- 1 tablespoon unsweetened cocoa powder
- 1 teaspoon baking powder
- ½ teaspoon baking soda
- ½ teaspoon salt
- ½ cup unsalted butter, softened
- 1 cup granulated sugar
- 2 large eggs
- 1 teaspoon vanilla extract
- 1 tablespoon red food coloring
- ½ cup buttermilk
- 1 teaspoon white vinegar
For the Frosting:
- 4 ounces cream cheese, softened
- 2 tablespoons unsalted butter, softened
- 1 ½ cups powdered sugar
- 1 teaspoon vanilla extract
For the Coating:
- 12 ounces white or semi-sweet chocolate (or candy melts)
- 1 tablespoon vegetable oil (optional, for thinning the coating)
- Sprinkles or other decorations (optional)
Ingredient Highlights
- Red Food Coloring: Essential for the signature red velvet color—use gel food coloring for a more vibrant hue without altering the texture of the cake.
- Buttermilk and Vinegar: These ingredients enhance the cake’s flavor and tenderness while giving it a slightly tangy edge.
- Cream Cheese Frosting: This rich, tangy frosting perfectly complements the moist red velvet cake and acts as the glue that holds the cake pops together.
- Chocolate Coating: Use white or dark chocolate, depending on your preference. Candy melts are also a great option for a fuss-free coating.
Instructions
Prepare the Cake:
- Preheat the Oven: Preheat your oven to 350°F (175°C). Grease and flour an 8×8-inch baking pan or line it with parchment paper.
- Mix the Dry Ingredients: In a medium bowl, whisk together the flour, cocoa powder, baking powder, baking soda, and salt. Set aside.
- Cream the Butter and Sugar: In a large mixing bowl, beat the softened butter and sugar with an electric mixer until light and fluffy, about 2-3 minutes.
- Add the Eggs and Vanilla: Beat in the eggs one at a time, followed by the vanilla extract and red food coloring.
- Add the Buttermilk and Vinegar: Mix in the buttermilk and vinegar, alternating with the dry ingredients, until the batter is smooth and well combined.
- Bake the Cake: Pour the batter into the prepared pan and bake for 25-30 minutes, or until a toothpick inserted in the center comes out clean. Let the cake cool completely.
Prepare the Cake Pops:
- Crumble the Cake: Once the cake is cool, crumble it into fine crumbs using your hands or a fork.
- Make the Frosting: In a medium bowl, beat the cream cheese, butter, powdered sugar, and vanilla extract until smooth and creamy.
- Combine Cake and Frosting: Add the frosting to the crumbled cake, a little at a time, until the mixture holds together when pressed. You may not need all of the frosting.
- Shape into Balls: Roll the mixture into 1-inch balls and place them on a baking sheet lined with parchment paper. Chill in the refrigerator for at least 1 hour, or freeze for 20-30 minutes, until firm.
Coat the Cake Pops:
- Melt the Chocolate: Melt the chocolate or candy melts in a microwave-safe bowl, stirring every 30 seconds until smooth. Add vegetable oil if the coating is too thick.
- Dip the Cake Pops: Insert a lollipop stick into each cake ball and dip it into the melted chocolate, turning to coat evenly. Tap off excess coating and place the cake pop upright on a piece of styrofoam or a cake pop stand.
- Decorate: While the coating is still wet, add sprinkles or other decorations if desired.
- Chill: Allow the cake pops to set completely at room temperature or in the refrigerator.
- Prep Time: 30 minutes
- Cook Time: 25-30 minutes
Nutrition
- Calories: 150 kcal
- Fat: 7g
- Carbohydrates: 20g
- Protein: 2g
Conclusion
Red Velvet Cake Pops are a delightful and versatile treat, perfect for any occasion. Whether you’re preparing them for a party, gifting them to someone special, or celebrating the holidays, these bite-sized desserts are guaranteed to impress. With their moist red velvet cake center, creamy frosting, and rich chocolate coating, they offer a perfect balance of flavors and textures.
The best part? These cake pops are easy to customize with different toppings, sprinkles, or colored chocolate drizzle to match any theme or event. They’re fun to make, even more fun to eat, and will quickly become a favorite for both kids and adults alike!
I’d love to see your Red Velvet Cake Pops creations! Share your photos on social media and tag me so I can see your delicious treats. Happy baking!


