
Introduction
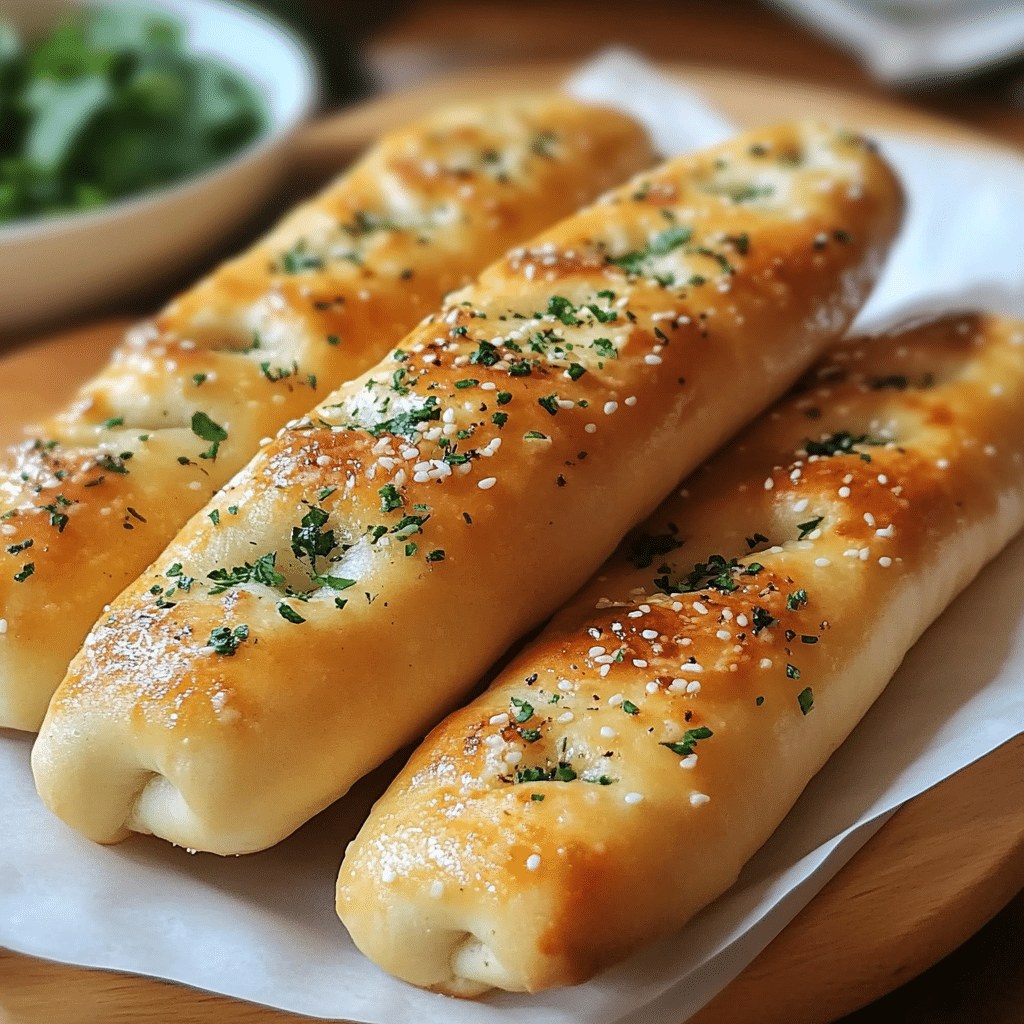
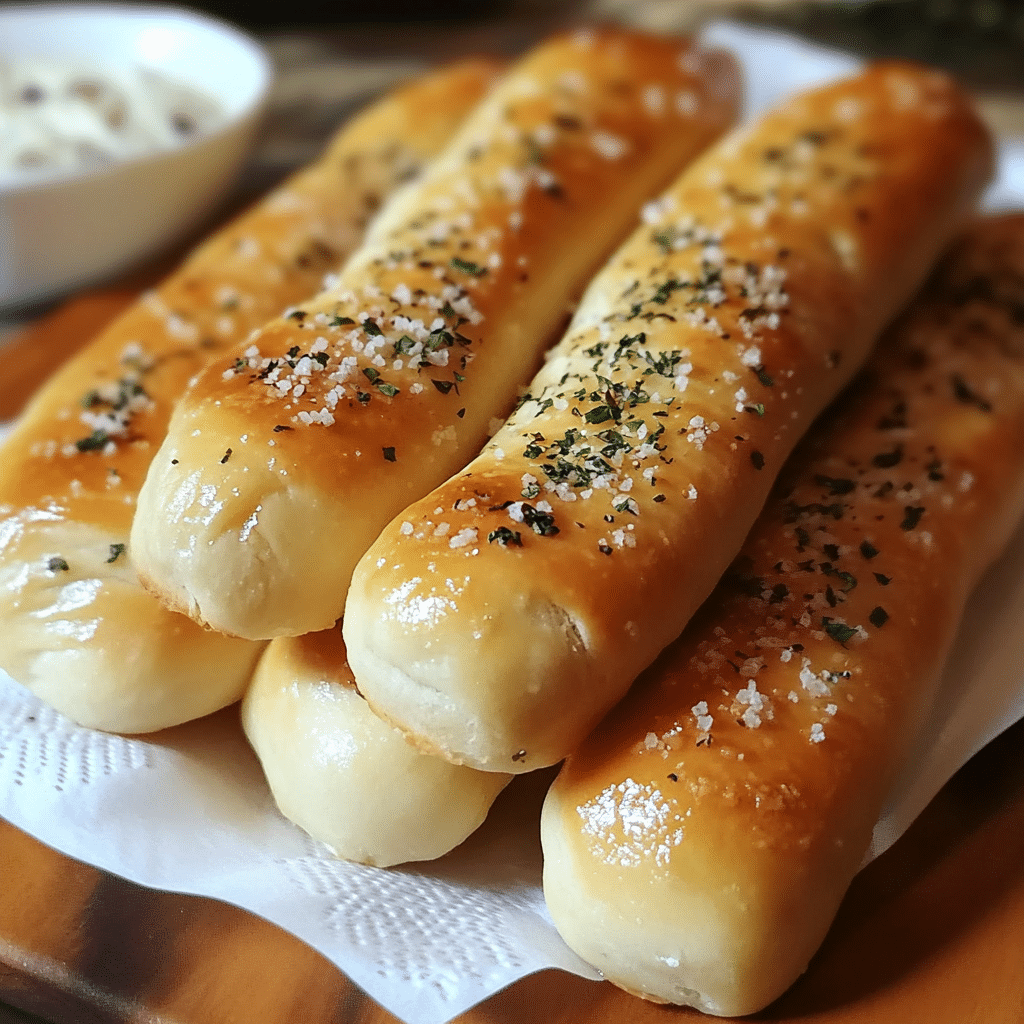
Olive Garden Breadsticks are soft, fluffy, and lightly seasoned with garlic and butter, making them the perfect side dish for any meal. These breadsticks are a copycat version of the beloved restaurant breadsticks that are known for their pillowy texture and irresistible flavor.
I first made these breadsticks when I wanted to recreate the magic of dining out at home, and they were an instant hit! The warm, buttery aroma fills the kitchen as they bake, and they pair perfectly with everything from pasta to soup to salad. The texture is just right—light and airy on the inside, with a slightly crispy exterior.
What makes these breadsticks so irresistible is the simple combination of warm bread, melted butter, and a hint of garlic. Whether you’re serving them for a family dinner or as part of a special occasion, they are guaranteed to be a crowd-pleaser.
Perfect for:
- Family dinners
- Holiday meals
- Pizza nights
- Serving with soup or salad
- Copycat recipe lovers
Why You’ll Love This Olive Garden Breadsticks
Here’s why Olive Garden Breadsticks will become your new favorite:
- Soft and Fluffy Texture: These breadsticks are light and airy, with a soft, pillowy center that everyone loves.
- Garlic Butter Coating: Brushed with a rich garlic butter sauce, these breadsticks are infused with a delicious garlic flavor that enhances their overall taste.
- Easy to Make: Despite their restaurant-quality taste, these breadsticks are simple to prepare and require minimal ingredients.
- Versatile: Perfect for pairing with pasta, soups, or salads, these breadsticks complement a wide range of dishes.
- Perfectly Golden: With the right bake time, these breadsticks come out golden and slightly crisp on the outside, with a tender interior.
Preparation and Cooking Time
- Total Time: 1 hour 15 minutes
- Preparation Time: 15 minutes
- Cooking Time: 10-12 minutes
- Servings: 12 breadsticks
- Calories per serving: Approximately 120-150 calories
- Key Nutrients: Protein: 3g, Carbs: 22g, Fat: 3g
Ingredients
Gather these ingredients to make your Olive Garden Breadsticks:
- 1 cup warm water (110°F)
- 2 teaspoons sugar
- 2 ¼ teaspoons active dry yeast
- 3 cups all-purpose flour
- 1 teaspoon salt
- 2 tablespoons olive oil (for dough)
- 3 tablespoons unsalted butter, melted (for brushing)
- 1 teaspoon garlic powder
- 1 teaspoon dried parsley (optional)
- 1 tablespoon olive oil (for brushing)
Ingredient Highlights
- Active Dry Yeast: The yeast is what gives these breadsticks their airy, fluffy texture. Be sure to use fresh, active dry yeast for the best results.
- Olive Oil: Olive oil adds richness to the dough and helps create a soft texture, making the breadsticks perfect for dipping.
- Garlic Powder and Butter: The garlic powder and butter provide that signature Olive Garden flavor that makes these breadsticks so irresistible.
- Flour: All-purpose flour is the foundation of the dough, contributing to the soft, chewy texture of the breadsticks.
Step-by-Step Instructions
Here’s how to make Olive Garden Breadsticks:
Prepare the Dough:
- Activate the Yeast: In a small bowl, combine the warm water, sugar, and active dry yeast. Stir gently and let it sit for 5-10 minutes, or until the yeast becomes foamy and bubbles appear on the surface.
- Mix the Dry Ingredients: In a large mixing bowl, whisk together the flour and salt.
- Combine Wet and Dry Ingredients: Add the activated yeast mixture and 2 tablespoons of olive oil to the dry ingredients. Stir until the dough starts to come together.
- Knead the Dough: Transfer the dough to a lightly floured surface and knead for about 5-7 minutes, or until the dough is smooth and elastic.
- First Rise: Place the dough in a lightly greased bowl, cover with a clean kitchen towel, and let it rise in a warm spot for 45 minutes to 1 hour, or until the dough has doubled in size.
Shape and Bake the Breadsticks:
- Preheat the Oven: Preheat your oven to 400°F (200°C) and line a baking sheet with parchment paper or a silicone baking mat.
- Shape the Dough: Once the dough has risen, punch it down gently and transfer it to a floured surface. Roll the dough into a rectangle about 1/2-inch thick. Cut the dough into 12 even strips using a sharp knife or pizza cutter.
- Form the Breadsticks: Carefully transfer each strip of dough to the prepared baking sheet, leaving some space between each breadstick. You can twist the dough strips slightly for a more rustic look if desired.
- Second Rise: Cover the breadsticks with a kitchen towel and let them rise for another 10-15 minutes while the oven preheats.
- Bake: Bake the breadsticks in the preheated oven for 10-12 minutes, or until they are golden brown and cooked through.
Add the Garlic Butter:
- Prepare the Garlic Butter: While the breadsticks are baking, melt the butter in a small saucepan over low heat. Stir in the garlic powder and parsley (if using).
- Brush with Garlic Butter: As soon as the breadsticks come out of the oven, brush them generously with the garlic butter mixture. This will infuse the breadsticks with the classic Olive Garden flavor.
- Serve: Serve the breadsticks warm with your favorite pasta, soup, or salad.
How to Serve Olive Garden Breadsticks
Olive Garden Breadsticks are perfect for serving in various ways:
- As a Side: Serve these breadsticks alongside pasta, soups, or salads for a classic meal.
- With Olive Oil or Marinara Sauce: For extra flavor, dip these breadsticks in olive oil, marinara sauce, or ranch dressing.
- For Appetizers: They can be served as appetizers at parties or gatherings, paired with a dipping sauce for an extra treat.
- With a Warm Soup: Pair them with your favorite soup, like minestrone or chicken noodle, for a comforting meal.
Additional Tips for Olive Garden Breadsticks
Here are some tips to ensure your Olive Garden Breadsticks are perfect every time:
- Don’t Overheat the Water: Make sure the water is warm, not hot, when activating the yeast. Water that’s too hot can kill the yeast, resulting in flat breadsticks.
- Let the Dough Rise: Be patient and let the dough rise fully, as this is what makes the breadsticks fluffy and light.
- Brush with Garlic Butter While Hot: For maximum flavor, brush the breadsticks with garlic butter as soon as they come out of the oven.
- Add Cheese: For extra flavor, sprinkle grated Parmesan cheese on top of the breadsticks after brushing with the garlic butter.
- Use Parchment Paper: Parchment paper makes cleanup easier and helps the breadsticks bake evenly without sticking.
Recipe Variations for Olive Garden Breadsticks
Here are 10 variations you can try for Olive Garden Breadsticks:
- Cheese-Stuffed Breadsticks: Add mozzarella cheese to the center of the dough before rolling it up to make cheesy breadsticks.
- Herb-Infused Breadsticks: Add finely chopped rosemary, thyme, or oregano to the dough for an herby twist.
- Garlic Parmesan Breadsticks: After brushing the breadsticks with garlic butter, sprinkle them with Parmesan cheese for an extra cheesy flavor.
- Cinnamon Sugar Breadsticks: For a sweet variation, brush the breadsticks with cinnamon butter and sprinkle with cinnamon sugar.
- Gluten-Free Breadsticks: Use a gluten-free flour blend to make these breadsticks gluten-free.
- Spicy Breadsticks: Add a pinch of red pepper flakes to the garlic butter for a spicy kick.
- Olive Garden Style Breadstick Bites: Roll the dough into bite-sized pieces and bake them for mini breadsticks perfect for dipping.
- Butter-Cream Cheese Frosting: Make a sweet dipping sauce by combining butter and cream cheese to serve with the breadsticks.
- Sweet Potato Breadsticks: Mix in mashed sweet potato for a different flavor and texture.
- Vegan Breadsticks: Use dairy-free butter and omit the cheese for a vegan version of these breadsticks.
Freezing and Storage for Olive Garden Breadsticks
- Freezing: Freeze baked breadsticks for up to 3 months. Wrap them tightly in plastic wrap or aluminum foil, and store in a zip-top bag. Thaw at room temperature before reheating.
- Storage: Store leftover breadsticks in an airtight container at room temperature for up to 2-3 days. For longer storage, keep them in the fridge for up to a week.
Special Equipment for Olive Garden Breadsticks
Here are some special equipment items to make preparing your Olive Garden Breadsticks easier:
- Mixing Bowls: Use a variety of sizes for mixing wet and dry ingredients separately.
- Baking Sheets: Line baking sheets with parchment paper or silicone mats for easy cleanup.
- Rolling Pin: Roll the dough into a uniform thickness for even baking.
- Kitchen Towel: Keep a kitchen towel handy for covering the dough during rising.
- Pastry Brush: Use a pastry brush to evenly coat the breadsticks with garlic butter.
Frequently Asked Questions for Olive Garden Breadsticks
- Can I use bread flour instead of all-purpose flour?
Yes, you can use bread flour for a chewier texture, but all-purpose flour works perfectly for soft breadsticks. - Can I make the dough in advance?
Yes, you can prepare the dough in advance and refrigerate it overnight. Let it come to room temperature before shaping and baking. - Can I use a stand mixer for the dough?
Yes, a stand mixer with a dough hook is perfect for kneading the dough if you prefer to skip kneading by hand. - Can I freeze the dough before baking?
Yes, you can freeze the shaped breadsticks before baking. Let them thaw and rise before baking.

Olive Garden Breadsticks
- Total Time: 1 hour 15 minutes
- Yield: 12 servings 1x
Description
Olive Garden Breadsticks are soft, fluffy, and lightly seasoned with garlic and butter, making them the perfect side dish for any meal. These breadsticks are a copycat version of the beloved restaurant breadsticks that are known for their pillowy texture and irresistible flavor. Whether you serve them with pasta, soup, or salad, they are guaranteed to be a hit with your family and friends. The combination of warm bread, melted butter, and a hint of garlic makes these breadsticks impossible to resist.
Ingredients
- 1 cup warm water (110°F)
- 2 teaspoons sugar
- 2 ¼ teaspoons active dry yeast
- 3 cups all-purpose flour
- 1 teaspoon salt
- 2 tablespoons olive oil (for dough)
- 3 tablespoons unsalted butter, melted (for brushing)
- 1 teaspoon garlic powder
- 1 teaspoon dried parsley (optional)
- 1 tablespoon olive oil (for brushing)
Ingredient Highlights
- Active Dry Yeast: The yeast is what gives these breadsticks their airy, fluffy texture. Be sure to use fresh, active dry yeast for the best results.
- Olive Oil: Olive oil adds richness to the dough and helps create a soft texture, making the breadsticks perfect for dipping.
- Garlic Powder and Butter: The garlic powder and butter provide that signature Olive Garden flavor that makes these breadsticks so irresistible.
- Flour: All-purpose flour is the foundation of the dough, contributing to the soft, chewy texture of the breadsticks.
Instructions
Prepare the Dough:
- Activate the Yeast: In a small bowl, combine the warm water, sugar, and active dry yeast. Stir gently and let it sit for 5-10 minutes, or until the yeast becomes foamy and bubbles appear on the surface.
- Mix the Dry Ingredients: In a large mixing bowl, whisk together the flour and salt.
- Combine Wet and Dry Ingredients: Add the activated yeast mixture and 2 tablespoons of olive oil to the dry ingredients. Stir until the dough starts to come together.
- Knead the Dough: Transfer the dough to a lightly floured surface and knead for about 5-7 minutes, or until the dough is smooth and elastic.
- First Rise: Place the dough in a lightly greased bowl, cover with a clean kitchen towel, and let it rise in a warm spot for 45 minutes to 1 hour, or until the dough has doubled in size.
Shape and Bake the Breadsticks:
- Preheat the Oven: Preheat your oven to 400°F (200°C) and line a baking sheet with parchment paper or a silicone baking mat.
- Shape the Dough: Once the dough has risen, punch it down gently and transfer it to a floured surface. Roll the dough into a rectangle about 1/2-inch thick. Cut the dough into 12 even strips using a sharp knife or pizza cutter.
- Form the Breadsticks: Carefully transfer each strip of dough to the prepared baking sheet, leaving some space between each breadstick. You can twist the dough strips slightly for a more rustic look if desired.
- Second Rise: Cover the breadsticks with a kitchen towel and let them rise for another 10-15 minutes while the oven preheats.
- Bake: Bake the breadsticks in the preheated oven for 10-12 minutes, or until they are golden brown and cooked through.
Add the Garlic Butter:
- Prepare the Garlic Butter: While the breadsticks are baking, melt the butter in a small saucepan over low heat. Stir in the garlic powder and parsley (if using).
- Brush with Garlic Butter: As soon as the breadsticks come out of the oven, brush them generously with the garlic butter mixture. This will infuse the breadsticks with the classic Olive Garden flavor.
- Serve: Serve the breadsticks warm with your favorite pasta, soup, or salad.
- Prep Time: 15 minutes
- Cook Time: 10-12 minutes
Nutrition
- Calories: 120-150 kcal
- Fat: 3g
- Carbohydrates: 22g
- Protein: 3g
Conclusion
Olive Garden Breadsticks are the perfect addition to any meal, offering a soft, fluffy texture and delicious garlic butter flavor. Whether you’re serving them with pasta, soup, or salad, these breadsticks are guaranteed to impress. Easy to make and versatile, they are sure to become a favorite in your kitchen. Try them today and bring a little bit of the Olive Garden experience to your own home!
This recipe is as simple as it is satisfying, making it ideal for everything from casual weeknight dinners to special gatherings. Whether you’re sharing them with family or enjoying them on your own, these breadsticks are the perfect side to complement any dish.
I’d love to see how your Olive Garden Breadsticks turn out! Snap a photo, share it on social media, and don’t forget to tag me—I can’t wait to see your delicious creations. Happy baking!


