
Introduction
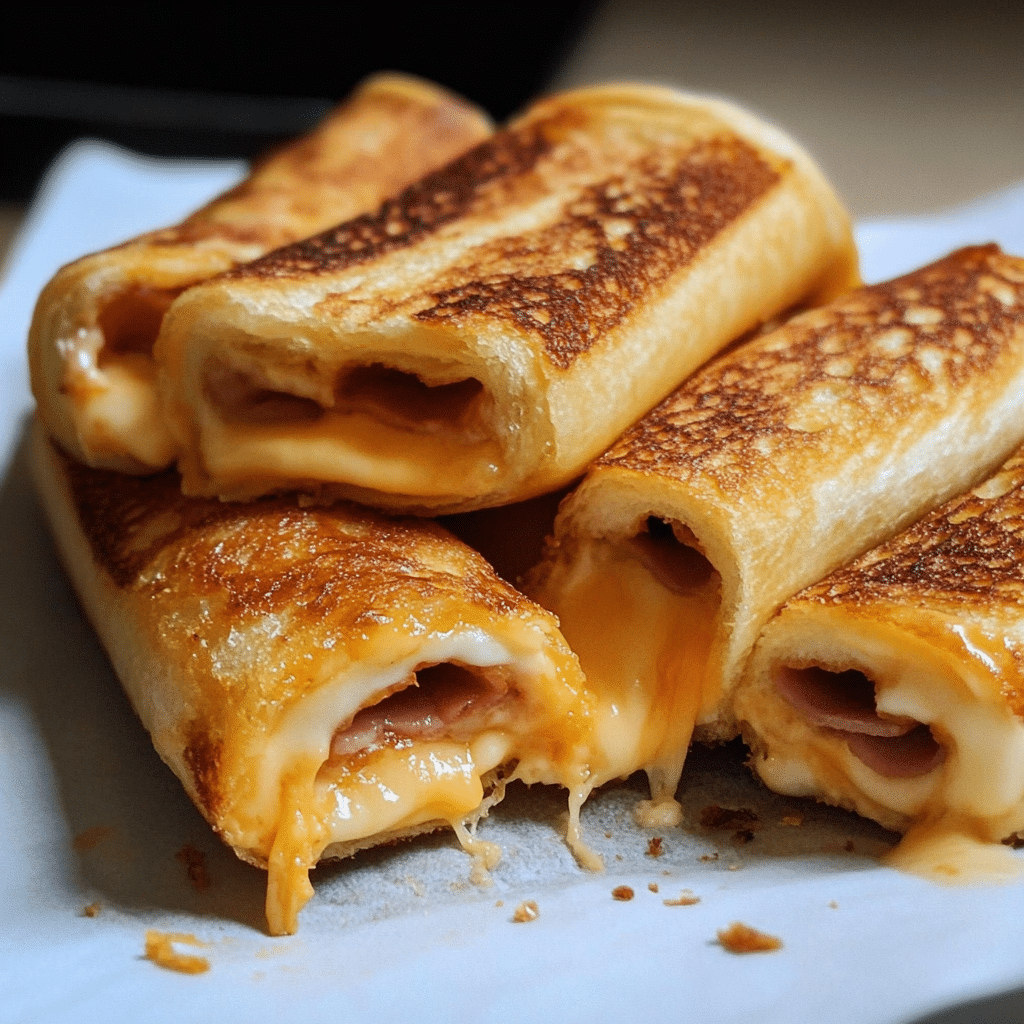
Grilled Cheese Roll-Ups take the classic comfort food to a fun and easy-to-eat level. Instead of the traditional sandwich, these cheesy rolls are made by rolling up bread with melted cheese inside and then grilling them to perfection. The result is a crispy, golden exterior with a gooey, melty cheese center that’s sure to satisfy any cheese lover’s cravings.
I first made these for a casual family dinner, and they quickly became a favorite. The best part about these roll-ups is how versatile they are—you can use any type of bread or cheese to customize them to your liking. They’re perfect for kids, a quick snack, or even a creative spin on your next casual meal. Add a little extra flavor by dipping them in marinara sauce, ketchup, or even a creamy ranch dressing!
What’s great about Grilled Cheese Roll-Ups is how simple they are to make. With just a few ingredients and a few minutes on the grill, you can have a delicious snack that’s sure to please everyone. Whether you’re looking for a fun lunch or a tasty treat for a gathering, these roll-ups are a hit every time!
Perfect for:
- Quick and easy snacks
- Kids’ lunches
- Movie nights
- Casual dinners
- Grilled cheese lovers
Why You’ll Love This Grilled Cheese Roll-Ups
Here’s why Grilled Cheese Roll-Ups will quickly become your favorite snack or meal:
- Fun Twist on a Classic: These roll-ups offer a fresh take on the classic grilled cheese sandwich, making it a fun and interactive food experience.
- Crispy and Gooey: The combination of a crispy, golden exterior with a warm, gooey cheese center makes every bite irresistible.
- Quick and Easy: With just a few ingredients and a quick cooking time, these roll-ups are perfect for busy days when you want something comforting but fast.
- Customizable: You can customize these roll-ups by adding extras like bacon, tomatoes, or herbs for added flavor.
- Kid-Friendly: Kids will love these bite-sized rolls, making them an excellent choice for lunchboxes or after-school snacks.
Preparation and Cooking Time
- Total Time: 15 minutes
- Preparation Time: 5 minutes
- Cooking Time: 5-8 minutes
- Servings: 4-6 roll-ups
- Calories per serving: Approximately 150-200 calories per roll-up
- Key Nutrients: Protein: 8g, Carbs: 15g, Fat: 12g
Ingredients
Here’s what you’ll need to make Grilled Cheese Roll-Ups:
- 6 slices white or whole wheat bread (crusts removed)
- 4 oz shredded cheddar cheese (or your favorite cheese)
- 1 tablespoon butter (softened)
- 1 tablespoon mayonnaise (optional for extra crispiness)
- Salt and pepper to taste (optional)
- 1 teaspoon garlic powder (optional)
- 1 tablespoon grated Parmesan cheese (optional, for extra flavor)
Ingredient Highlights
- Bread: Soft white or whole wheat bread works best for these roll-ups, but feel free to experiment with different types of bread for varying textures and flavors.
- Cheddar Cheese: Shredded cheddar melts beautifully, but you can also use other cheeses like mozzarella, American cheese, or Swiss for a different flavor profile.
- Butter: Butter adds richness and helps create that crispy, golden crust when grilled.
- Mayonnaise (Optional): Adding mayonnaise to the outside of the bread before grilling gives the roll-ups an extra crisp and golden finish.
- Garlic Powder and Parmesan (Optional): These ingredients can enhance the flavor, adding depth and savory notes to the roll-ups.
Step-by-Step Instructions
Here’s how to make Grilled Cheese Roll-Ups:
Prepare the Bread and Cheese:
- Remove the Crusts: Using a serrated knife, carefully trim the crusts off the bread slices. This makes it easier to roll the bread and ensures the roll-ups hold together.
- Flatten the Bread: Use a rolling pin or the palm of your hand to gently flatten each slice of bread. This will help the roll-ups stay tightly rolled and hold more cheese.
- Add the Cheese: Place a generous amount of shredded cheese (about 1-2 tablespoons) in the center of each bread slice.
Roll and Grill the Roll-Ups:
- Roll the Bread: Starting from one edge, carefully roll each slice of bread tightly around the cheese. Pinch the ends to seal in the cheese as best as you can.
- Butter the Roll-Ups: Spread a thin layer of butter on the outside of each roll-up. You can also spread mayonnaise for extra crispiness if desired.
- Cook the Roll-Ups: Heat a skillet over medium heat. Once hot, place the roll-ups in the skillet seam-side down. Grill for 2-3 minutes on each side or until golden brown and crispy. Use tongs to flip the roll-ups carefully, making sure the cheese doesn’t spill out.
- Serve: Remove from the skillet and serve immediately while the cheese is still gooey and warm.

How to Serve Grilled Cheese Roll-Ups
Grilled Cheese Roll-Ups are versatile and can be served in many fun and creative ways:
- With Tomato Soup: These roll-ups are the perfect pairing for a bowl of creamy tomato soup, making for the ultimate comfort meal.
- For a Snack: Serve these as a quick snack for kids or adults, either as-is or with a dipping sauce.
- As an Appetizer: Serve them with marinara sauce or ranch dressing for a fun and flavorful appetizer at parties.
- In a Lunchbox: Pack these roll-ups in lunchboxes for a fun and satisfying midday meal.
- With a Salad: Pair these cheesy rolls with a light side salad for a balanced meal.
Additional Tips for Grilled Cheese Roll-Ups
Here are some tips to ensure this recipe are perfectly crispy and cheesy every time:
- Flatten the Bread: Make sure to flatten the bread slices well before rolling them. This helps prevent the roll-ups from being too thick and difficult to cook evenly.
- Use Shredded Cheese: Shredded cheese melts better and more evenly than slices, helping to avoid any “cheese explosions” during cooking.
- Don’t Overstuff: Don’t overload the bread with cheese, as it can make it harder to seal the roll-ups and may cause the cheese to leak out while cooking.
- Experiment with Add-ins: You can customize these roll-ups by adding extras like cooked bacon, sautéed onions, or fresh herbs for a personalized touch.
- Use Low and Slow Heat: Cooking over medium heat ensures that the bread gets crispy without burning while the cheese melts perfectly.
Recipe Variations for Grilled Cheese Roll-Ups
Here are 10 variations you can try for this recipe:
- Bacon Grilled Cheese Roll-Ups: Add crispy bacon strips to the cheese before rolling the bread for a smoky, savory twist.
- Tomato Basil Grilled Cheese Roll-Ups: Add a few thin slices of tomato and some fresh basil leaves for a Caprese-inspired flavor.
- Garlic Parmesan Grilled Cheese Roll-Ups: Mix garlic powder and grated Parmesan cheese into the bread before rolling for extra flavor.
- Ham and Cheese Roll-Ups: Add thin slices of ham along with the cheese for a ham-and-cheese version of the roll-ups.
- Spicy Grilled Cheese Roll-Ups: Add jalapeño slices or a dash of hot sauce to the cheese mixture for a spicy kick.
- Mozzarella and Pesto Roll-Ups: Use mozzarella cheese and add a small amount of pesto for a fresh and herbaceous twist.
- BBQ Chicken Grilled Cheese Roll-Ups: Add shredded cooked chicken and a drizzle of barbecue sauce for a BBQ-inspired treat.
- Spinach and Artichoke Grilled Cheese Roll-Ups: Sauté spinach and artichoke hearts and mix them with the cheese for a rich, savory filling.
- Mac and Cheese Grilled Cheese Roll-Ups: Spoon some mac and cheese into the center of each roll-up for a cheesy, comfort-food overload.
- Vegan Grilled Cheese Roll-Ups: Use vegan cheese and dairy-free butter to make a vegan version of these roll-ups.
Freezing and Storage for Grilled Cheese Roll-Ups
- Freezing: You can freeze these Grilled Cheese Roll-Ups for up to 1 month. After grilling and cooling, place them on a baking sheet and freeze until firm. Then, transfer to a zip-top bag and store in the freezer. To reheat, bake them in the oven or heat them in a skillet for a few minutes until crispy and heated through.
- Storage: Store any leftover roll-ups in an airtight container in the refrigerator for up to 3 days. Reheat in a skillet or the oven for the best texture.
Special Equipment for Grilled Cheese Roll-Ups
Here are some special tools to make preparing this recipe easier:
- Rolling Pin: Use a rolling pin to flatten the bread evenly before rolling it up.
- Skillet or Griddle: A non-stick skillet or griddle is perfect for grilling the roll-ups and getting a nice, even golden-brown crust.
- Tongs: Use tongs to carefully flip the roll-ups without squeezing out the melted cheese.
- Spreader: A butter spreader or knife is useful for spreading butter or mayonnaise on the outside of the roll-ups.
Frequently Asked Questions for Grilled Cheese Roll-Ups
- Can I use gluten-free bread for this recipe?
Yes, you can substitute gluten-free bread for regular bread to make these roll-ups gluten-free. - Can I make these roll-ups in advance?
Yes, you can prepare the roll-ups ahead of time, refrigerate them, and grill them when you’re ready to serve. - Can I use different types of cheese?
Absolutely! Feel free to use mozzarella, Swiss, or any cheese that melts well for different flavors. - How do I keep the cheese from leaking out while grilling?
Ensure the bread is tightly rolled and sealed at the edges. Avoid overstuffing the rolls with cheese. - Can I make these roll-ups in the oven?
Yes, you can bake the roll-ups at 375°F (190°C) for about 10-12 minutes, flipping them halfway through, until golden brown and crispy.

Grilled Cheese Roll-Ups
- Total Time: 15 minutes
- Yield: 4–6 servings 1x
Description
Grilled Cheese Roll-Ups take the classic comfort food to a fun and easy-to-eat level. Instead of the traditional sandwich, these cheesy rolls are made by rolling up bread with melted cheese inside and then grilling them to perfection. The result is a crispy, golden exterior with a gooey, melty cheese center that’s sure to satisfy any cheese lover’s cravings. These Grilled Cheese Roll-Ups are great for kids, a quick snack, or a creative spin on your next casual meal.
Ingredients
- 6 slices white or whole wheat bread (crusts removed)
- 4 oz shredded cheddar cheese (or your favorite cheese)
- 1 tablespoon butter (softened)
- 1 tablespoon mayonnaise (optional for extra crispiness)
- Salt and pepper to taste (optional)
- 1 teaspoon garlic powder (optional)
- 1 tablespoon grated Parmesan cheese (optional, for extra flavor)
Ingredient Highlights
- Bread: Soft white or whole wheat bread works best for these roll-ups, but feel free to experiment with different types of bread for varying textures and flavors.
- Cheddar Cheese: Shredded cheddar melts beautifully, but you can also use other cheeses like mozzarella, American cheese, or Swiss for a different flavor profile.
- Butter: Butter adds richness and helps create that crispy, golden crust when grilled.
- Mayonnaise (Optional): Adding mayonnaise to the outside of the bread before grilling gives the roll-ups an extra crisp and golden finish.
- Garlic Powder and Parmesan (Optional): These ingredients can enhance the flavor, adding depth and savory notes to the roll-ups.
Instructions
Prepare the Bread and Cheese:
- Remove the Crusts: Using a serrated knife, carefully trim the crusts off the bread slices. This makes it easier to roll the bread and ensures the roll-ups hold together.
- Flatten the Bread: Use a rolling pin or the palm of your hand to gently flatten each slice of bread. This will help the roll-ups stay tightly rolled and hold more cheese.
- Add the Cheese: Place a generous amount of shredded cheese (about 1-2 tablespoons) in the center of each bread slice.
Roll and Grill the Roll-Ups:
- Roll the Bread: Starting from one edge, carefully roll each slice of bread tightly around the cheese. Pinch the ends to seal in the cheese as best as you can.
- Butter the Roll-Ups: Spread a thin layer of butter on the outside of each roll-up. You can also spread mayonnaise for extra crispiness if desired.
- Cook the Roll-Ups: Heat a skillet over medium heat. Once hot, place the roll-ups in the skillet seam-side down. Grill for 2-3 minutes on each side or until golden brown and crispy. Use tongs to flip the roll-ups carefully, making sure the cheese doesn’t spill out.
- Serve: Remove from the skillet and serve immediately while the cheese is still gooey and warm.
- Prep Time: 5 minutes
- Cook Time: 5-8 minutes
Nutrition
- Calories: 150-200 kcal
- Fat: 12g
- Carbohydrates: 15g
- Protein: 8g
Conclusion
Grilled Cheese Roll-Ups are a simple, delicious, and fun twist on a classic favorite. With their crispy exterior and cheesy center, these roll-ups are sure to satisfy your cravings. They’re quick to make, customizable, and perfect for any meal or snack. Whether you’re serving them as a snack for kids, a party appetizer, or as a quick dinner, these roll-ups are guaranteed to be a hit!
This recipe is as easy to prepare as it is tasty, making it perfect for everything from casual meals to fun gatherings. Whether you’re making them for a family lunch or serving them at a party, these grilled cheese roll-ups are sure to be the star of the show.
I’d love to see how your Grilled Cheese Roll-Ups turn out! Snap a photo, share it on social media, and don’t forget to tag me—I can’t wait to see your delicious creations. Happy cooking!


