
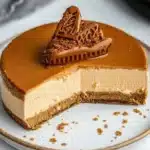
Easy No-Bake Lotus Biscoff Cheesecake Recipe is a delightful dessert that combines the rich, caramelized flavors of Lotus Biscoff cookies with the creamy texture of cheesecake. This incredible dessert is perfect for impressing guests or simply indulging yourself. The unique combination of flavors leaves every bite tasting heavenly, putting it in a league of its own among cheesecakes. Whether you are a baking novice or a seasoned pro, this recipe is simple and requires minimal effort, making it perfect for any occasion.
If you’ve ever savored a Lotus Biscoff cookie, you know how addictively delicious they can be. Paired with the sweetness of cream cheese and the smoothness of whipped cream, this cheesecake bursts with flavor that will transport you to dessert paradise. The best part? You won’t need to turn on your oven! With a few easy steps, you can create a dessert that is not only visually stunning but will also leave your taste buds dancing with joy.
Throughout this article, we will explore everything you need to know about making this Easy No-Bake Lotus Biscoff Cheesecake. From preparation times to serving suggestions, we have you covered. Let’s dive into why this cheesecake is a must-try recipe!
Why You’ll Love This Recipe
There are several reasons why this Easy No-Bake Lotus Biscoff Cheesecake will quickly become a favorite in your home:
1. Effortless Preparation: No baking required! You can whip this dessert together in no time.
2. Decadent Flavor: The distinct taste of Lotus Biscoff cookies combined with creamy cheesecake is irresistible.
3. Versatile Dessert: Perfect for birthdays, gatherings, or just a treat for yourself.
4. Great Texture: With a crunchy crust and smooth filling, every bite offers a delightful contrast.
5. Impressive Presentation: The layered look makes it a stunning centerpiece for any dessert table.
6. No Special Equipment Needed: You only need basic kitchen tools to create this masterpiece.
With these enticing qualities, it’s easy to see why this cheesecake is a favorite among dessert lovers.
Preparation and Cooking Time
Preparing this Easy No-Bake Lotus Biscoff Cheesecake is quick and straightforward. Here’s a breakdown of the time required:
– Preparation Time: 25 minutes
– Refrigeration Time: 4–6 hours (or overnight for best results)
Keep in mind that the refrigeration time is essential. This allows the cheesecake to set properly, creating the ideal texture for serving.
Ingredients
– 250g Lotus Biscoff cookies (for crust and topping)
– 75g unsalted butter, melted
– 400g cream cheese, softened
– 100g powdered sugar
– 300ml heavy whipping cream
– 1 teaspoon vanilla extract
– Additional Lotus Biscoff cookies for topping
Step-by-Step Instructions
Creating this Easy No-Bake Lotus Biscoff Cheesecake is a breeze. Follow these simple steps for success:
1. Prepare the Crust: Begin by crushing the 250g of Lotus Biscoff cookies into fine crumbs. You can use a food processor or place them in a zip-lock bag and crush them with a rolling pin.
2. Mix with Butter: In a mixing bowl, combine the crushed cookies with the 75g of melted butter. Stir until the mixture resembles wet sand.
3. Press into Pan: Press the cookie mixture firmly into the bottom of a 9-inch springform pan to form an even crust. Use the back of a spoon or your hands to pack it down tightly.
4. Create the Filling: In another bowl, beat the 400g of softened cream cheese and 100g of powdered sugar until creamy and smooth.
5. Incorporate Whipping Cream: In a separate bowl, whip the 300ml of heavy whipping cream and 1 teaspoon of vanilla extract until soft peaks form. Gently fold the whipped cream into the cream cheese mixture until fully combined.
6. Combine Layers: Pour the cream cheese filling into the crust, spreading it evenly. Smooth the top with a spatula.
7. Chill: Cover the cheesecake with plastic wrap and place it in the refrigerator for at least 4-6 hours, or overnight for best results.
8. Prepare for Serving: Once it has set, remove the cheesecake from the springform pan. Decorate the top with additional crushed Lotus Biscoff cookies for a beautiful finish.
9. Slice and Serve: Cut the cheesecake into generous slices and place them on serving plates.
How to Serve
When it comes to serving your Easy No-Bake Lotus Biscoff Cheesecake, consider the following tips for an elegant presentation:
1. Garnish: Add whipped cream dollops on each slice for an extra touch of indulgence. You can also drizzle some melted Biscoff spread on top.
2. Serve with Coffee: This cheesecake pairs beautifully with a cup of coffee, making it a perfect after-dinner treat.
3. Upgrade Your Plate: Use colorful plates to enhance the dish’s presentation and make it even more inviting.
4. Chilled Slices: Always serve the cheesecake chilled for the best flavor and texture.
With these simple serving suggestions, your Easy No-Bake Lotus Biscoff Cheesecake will surely impress everyone, making it a celebrated dessert at any gathering!
Additional Tips
– Use Fresh Ingredients: Opt for fresh cream cheese and whipping cream for the best flavor and texture in your Easy No-Bake Lotus Biscoff Cheesecake.
– Allow for Proper Refrigeration: Ensuring that you refrigerate the cheesecake long enough will result in a better texture. If possible, aim for overnight cooling.
– Use a Spatula for Smooth Finishing: A flat spatula can help in smoothing the top layer of the filling, giving your cheesecake a professional finish.
– Taste Before Setting: Always indulge with a small taste of the filling before you pour it into the crust. This way, you can adjust sweetness or flavor as needed.
– Experiment with Toppings: Feel free to experiment with different toppings, like caramel drizzle or chocolate shavings, for added excitement.
Recipe Variation
Get creative with these variations of your Easy No-Bake Lotus Biscoff Cheesecake:
1. Chocolate Biscoff Cheesecake: Add cocoa powder to the filling for a chocolatey twist, or incorporate melted chocolate for a richer flavor.
2. Fruity Addition: Layer fresh fruits, such as banana slices or berries, in the cheesecake for a refreshing contrast.
3. Nutty Twist: Fold crushed nuts, like almonds or hazelnuts, into the filling for added texture and flavor.
4. Biscoff Swirl Cheesecake: Swirl some melted Biscoff spread through the filling before refrigerating for a marbled effect.
5. Mini Cheesecakes: Consider making individual cheesecakes using muffin tins for easy serving at parties.
Freezing and Storage
– Storage: Keep your Easy No-Bake Lotus Biscoff Cheesecake stored in an airtight container in the refrigerator. It should stay fresh for about 4-5 days.
– Freezing: You can freeze the cheesecake for up to 3 months. Slice it into portions first, wrap them well in plastic wrap, and then place them in a freezer-safe container to prevent freezer burn.
Special Equipment
To create this Easy No-Bake Lotus Biscoff Cheesecake, you will need:
– 9-inch springform pan
– Mixing bowls
– Food processor or zip-lock bags for crushing cookies
– Spatula for smoothing the filling
– Electric mixer for whipping cream
Frequently Asked Questions
Can I use non-dairy alternatives for the cream cheese and whipping cream?
Yes, you can use non-dairy cream cheese and whipping cream if you want a dairy-free version.
What is the best way to crush the cookies?
Using a food processor is the quickest method. However, if you don’t have one, place the cookies in a zip-lock bag and crush them with a rolling pin for an effective alternative.
How can I tell if the cheesecake is set?
After chilling, the cheesecake should be firm to the touch and hold its shape when sliced. A light jiggle is okay, but it should not be runny.
Is it necessary to use a springform pan?
While a springform pan is ideal, you can use a regular cake pan. Just make sure to line it with parchment paper for easy removal.
Can I add more sugar to the filling?
Yes, you can adjust the sweetness to your taste. Just keep in mind that Biscoff cookies are already sweet.
Conclusion
The Easy No-Bake Lotus Biscoff Cheesecake is not only simple to prepare but also incredibly delicious. Its creamy texture, coupled with the unique flavor of Lotus Biscoff cookies, makes it a standout dessert. Ideal for any occasion, this cheesecake is easy to customize and sure to impress. Whether you’re hosting a gathering or enjoying a quiet night in, this cheesecake is the perfect treat!
Easy No-Bake Lotus Biscoff Cheesecake Recipe: An Incredible Ultimate Dessert
- Total Time: 0 hours
Ingredients
– 250g Lotus Biscoff cookies (for crust and topping)
– 75g unsalted butter, melted
– 400g cream cheese, softened
– 100g powdered sugar
– 300ml heavy whipping cream
– 1 teaspoon vanilla extract
– Additional Lotus Biscoff cookies for topping
Instructions
Creating this Easy No-Bake Lotus Biscoff Cheesecake is a breeze. Follow these simple steps for success:
1. Prepare the Crust: Begin by crushing the 250g of Lotus Biscoff cookies into fine crumbs. You can use a food processor or place them in a zip-lock bag and crush them with a rolling pin.
2. Mix with Butter: In a mixing bowl, combine the crushed cookies with the 75g of melted butter. Stir until the mixture resembles wet sand.
3. Press into Pan: Press the cookie mixture firmly into the bottom of a 9-inch springform pan to form an even crust. Use the back of a spoon or your hands to pack it down tightly.
4. Create the Filling: In another bowl, beat the 400g of softened cream cheese and 100g of powdered sugar until creamy and smooth.
5. Incorporate Whipping Cream: In a separate bowl, whip the 300ml of heavy whipping cream and 1 teaspoon of vanilla extract until soft peaks form. Gently fold the whipped cream into the cream cheese mixture until fully combined.
6. Combine Layers: Pour the cream cheese filling into the crust, spreading it evenly. Smooth the top with a spatula.
7. Chill: Cover the cheesecake with plastic wrap and place it in the refrigerator for at least 4-6 hours, or overnight for best results.
8. Prepare for Serving: Once it has set, remove the cheesecake from the springform pan. Decorate the top with additional crushed Lotus Biscoff cookies for a beautiful finish.
9. Slice and Serve: Cut the cheesecake into generous slices and place them on serving plates.
- Prep Time: 25 minutes
- Cook Time: N/A
Nutrition
- Serving Size: 10 slices
- Calories: 430 kcal
- Fat: 30g
- Protein: 5g