
Chicken Kiev is a delightful dish that has its roots in Eastern European cuisine. This savory favorite not only tantalizes the taste buds but delivers a comforting experience that warms the soul. The simple idea of golden-breaded chicken filled with melty herb butter makes this dish a staple in many households. When you cut into the chicken, the luscious, garlicky butter oozes out, creating a mouthwatering explosion of flavor that keeps you coming back for more.
This incredible recipe is not just about feeding your hunger; it’s a perfect way to show love to family and friends. Chicken Kiev has an air of gourmet quality while being surprisingly easy to prepare at home. Whether you’re hosting an elegant dinner party or simply want to treat yourself, this dish will impress everyone around the table. Join me as we explore this beloved recipe, the reasons you’ll adore it, and how to create your very own Chicken Kiev masterpiece.
Why You’ll Love This Recipe
Chicken Kiev is adored by many for multiple reasons. Its unique combination of taste and texture captures the hearts of both the young and old. Here are a few reasons why this recipe stands out:
1. Irresistible Flavor: The rich garlic herb butter infuses the chicken with a burst of flavor that is deeply satisfying.
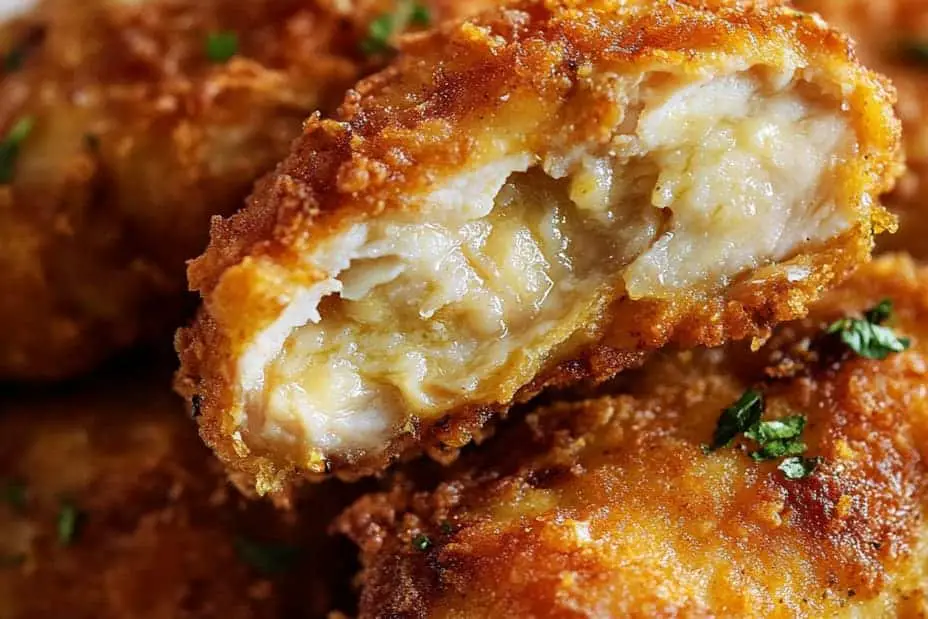
2. Crispy Coating: The golden, crispy breadcrumb exterior offers a delightful contrast to the tender chicken inside.
3. Versatile Meal: You can serve it as a main dish or incorporate it into various meals such as salads and sandwiches.
4. Impressive Presentation: The aesthetics of a perfectly made Chicken Kiev adds flair to any dinner table.
5. Comfort Food Appeal: This dish embodies the essence of comfort food, making it perfect for family gatherings or cozy nights in.
6. Simple Ingredients: The recipe uses everyday ingredients that you may already have in your kitchen.
Understanding these reasons gives clear insight into the magic of Chicken Kiev and why it’s worth adding to your culinary repertoire!
Preparation and Cooking Time
Making Chicken Kiev is straightforward and can be done in a timely manner. Here’s a quick breakdown:
– Preparation Time: 20 minutes
– Cooking Time: 25-30 minutes
– Total Time: 45-50 minutes
This makes it practical for a weeknight dinner without compromising on flavor or satisfaction.
Ingredients
– 4 boneless, skinless chicken breasts
– 1/2 cup unsalted butter, softened
– 3 cloves garlic, minced
– 2 tablespoons fresh parsley, chopped
– 1 tablespoon fresh dill, chopped
– 1 tablespoon fresh chives, chopped
– Salt, to taste
– Pepper, to taste
– 1 cup all-purpose flour
– 2 large eggs, beaten
– 2 cups breadcrumbs
– Oil, for frying (like vegetable or canola oil)
Step-by-Step Instructions
Creating the perfect Chicken Kiev is easy when you follow these clear steps:
1. Prepare the Herb Butter: In a bowl, mix softened butter, minced garlic, parsley, dill, chives, salt, and pepper. Blend until well combined.
2. Shape the Butter: Place the herb butter on a piece of plastic wrap and shape it into a log. Wrap it tightly and freeze for at least 30 minutes.
3. Prepare the Chicken: While the butter is chilling, pound the chicken breasts to an even thickness for even cooking.
4. Stuff the Chicken: Take the chilled herb butter out of the freezer and cut it into four equal pieces. Place a piece of butter in the center of each chicken breast. Fold the sides over and roll it tightly, securing with toothpicks or kitchen twine.
5. Coat the Chicken: Dredge each chicken roll in flour, shaking off the excess. Dip in beaten eggs, letting the excess drip off, and finally coat with breadcrumbs, pressing gently to ensure adherence.
6. Heat the Oil: In a large skillet, pour oil to a depth of about 1/2 inch. Heat over medium-high heat.
7. Fry the Chicken: Carefully place the chicken rolls in the hot oil. Fry for about 5-7 minutes on each side, or until golden brown and cooked through.
8. Drain: Once cooked, transfer the chicken to a plate lined with paper towels to drain excess oil.
9. Rest and Serve: Let the chicken rest for a few minutes before slicing. This helps retain the juices and nacho-filling butter.
10. Enjoy: Serve warm with a side of mashed potatoes or a fresh salad for a complete meal.
How to Serve
When it comes to serving Chicken Kiev, presentation and sides matter. Here are a few tips to enhance your dining experience:
1. Elegantly Plate: Place each Chicken Kiev on a warm plate, showcasing the crispy exterior. Consider garnishing with a sprinkle of fresh herbs.
2. Pair with a Side: Complement with buttery mashed potatoes, steamed vegetables, or a fresh green salad to balance the richness.
3. Add Sauce: A drizzle of garlic aioli or a wedge of lemon can brighten the flavors and provide additional moisture.
4. Wine Pairing: A crisp glass of white wine, like Sauvignon Blanc, pairs wonderfully, enhancing the meal’s overall experience.
5. Enjoy Freshly Made: Serve immediately while the chicken is hot and the buttery filling is beautifully molten.
By incorporating these serving suggestions, you can create an exciting and memorable meal with Chicken Kiev at the heart of it.
In summary, Chicken Kiev is not just a dish; it’s an unforgettable culinary experience. Its delightful combination of flavors and textures brings comfort and joy, making it an essential recipe for every home cook. With straightforward preparation and the promise of delicious results, you’ll find that Chicken Kiev deserves a spot in your weekly meal rotation. Enjoy cooking and savoring this classic comfort food with a delicious twist!
Additional Tips
– Pair with Sides: Mashed potatoes or a fresh salad complement Chicken Kiev beautifully and balance its richness.
– Use Fresh Herbs: Fresh herbs like parsley, dill, and chives elevate the flavor profile of the herb butter.
– Try Different Proteins: While traditionally made with chicken, this recipe can also be adapted using turkey or fish.
– Monitor Oil Temperature: Ensure your oil is at the right temperature to achieve a perfectly crispy exterior without burning.
– Let it Rest: After frying, allow the Chicken Kiev to rest for a few minutes before serving. This helps the juices redistribute.
Recipe Variation
Explore these fun variations to add a twist to your Chicken Kiev:
1. Stuffed with Cheese: For extra creaminess, add a slice of mozzarella or gouda alongside the herb butter.
2. Spicy Kick: Mix some crushed red pepper flakes or sriracha into the herb butter for a spicy version.
3. Gluten-Free Option: Substitute the all-purpose flour and breadcrumbs with gluten-free alternatives for a suitable dish for gluten-sensitive individuals.
4. Pesto Twist: Replace the herb butter with homemade or store-bought pesto for an Italian flair.
5. Mini Versions: Make bite-sized Chicken Kievs using smaller chicken cuts as appetizers for parties.
Freezing and Storage
– Storage: Keep leftover Chicken Kiev in an airtight container in the refrigerator for up to 3 days. Reheat in the oven for best results.
– Freezing: You can freeze uncooked Chicken Kievs for up to 3 months. Wrap them securely in plastic wrap and foil. When ready to cook, fry from frozen, adding an extra few minutes to the cooking time.
Special Equipment
To prepare Chicken Kiev successfully, ensure you have the following tools:
– Meat mallet or rolling pin for flattening chicken
– Plastic wrap for shaping the herb butter
– Mixing bowls for combining ingredients
– Frying pan or skillet for cooking
– Tongs for flipping the chicken
– Cooking thermometer (optional) to ensure the chicken is cooked through
Frequently Asked Questions
How can I tell when the chicken is fully cooked?
Use a meat thermometer. The internal temperature should reach 165°F (75°C).
Can I bake Chicken Kiev instead of frying it?
Yes, for a healthier option, bake the Chicken Kiev at 375°F (190°C) for about 25-30 minutes, or until cooked through.
What can I serve with Chicken Kiev?
It pairs wonderfully with mashed potatoes, a fresh garden salad, or roasted vegetables.
Is Chicken Kiev suitable for meal prepping?
Absolutely! It can be cooked in advance and reheated, making it a great choice for meal prepping.
Can I make Chicken Kiev ahead of time?
Certainly! You can prepare it up to the baking stage and refrigerate it. Just add a few extra minutes to cooking time if it’s cold when you start.
Conclusion
Chicken Kiev transcends being just a meal; it is a culinary adventure that embraces comfort and delight. With its crunchy coating, succulent chicken, and flavorful herb butter, this dish is a surefire way to bring joy to any dining table. Whether you’re entertaining guests or enjoying a cozy night in, Chicken Kiev proves to be an impressive and satisfying choice. Embrace the classic comfort food with a delicious twist and savor every bite!

Chicken Kiev: An Amazing Ultimate Comfort Food Recipe
- Total Time: 0 hours
Ingredients
– 4 boneless, skinless chicken breasts
– 1/2 cup unsalted butter, softened
– 3 cloves garlic, minced
– 2 tablespoons fresh parsley, chopped
– 1 tablespoon fresh dill, chopped
– 1 tablespoon fresh chives, chopped
– Salt, to taste
– Pepper, to taste
– 1 cup all-purpose flour
– 2 large eggs, beaten
– 2 cups breadcrumbs
– Oil, for frying (like vegetable or canola oil)
Instructions
Creating the perfect Chicken Kiev is easy when you follow these clear steps:
1. Prepare the Herb Butter: In a bowl, mix softened butter, minced garlic, parsley, dill, chives, salt, and pepper. Blend until well combined.
2. Shape the Butter: Place the herb butter on a piece of plastic wrap and shape it into a log. Wrap it tightly and freeze for at least 30 minutes.
3. Prepare the Chicken: While the butter is chilling, pound the chicken breasts to an even thickness for even cooking.
4. Stuff the Chicken: Take the chilled herb butter out of the freezer and cut it into four equal pieces. Place a piece of butter in the center of each chicken breast. Fold the sides over and roll it tightly, securing with toothpicks or kitchen twine.
5. Coat the Chicken: Dredge each chicken roll in flour, shaking off the excess. Dip in beaten eggs, letting the excess drip off, and finally coat with breadcrumbs, pressing gently to ensure adherence.
6. Heat the Oil: In a large skillet, pour oil to a depth of about 1/2 inch. Heat over medium-high heat.
7. Fry the Chicken: Carefully place the chicken rolls in the hot oil. Fry for about 5-7 minutes on each side, or until golden brown and cooked through.
8. Drain: Once cooked, transfer the chicken to a plate lined with paper towels to drain excess oil.
9. Rest and Serve: Let the chicken rest for a few minutes before slicing. This helps retain the juices and nacho-filling butter.
10. Enjoy: Serve warm with a side of mashed potatoes or a fresh salad for a complete meal.
- Prep Time: 15 minutes
- Cook Time: 25-30 minutes
Nutrition
- Serving Size: 4
- Calories: 421 kcal
- Fat: 22g
- Protein: 32g


